Uncategorized

Juda Ka Talab The Frozen Lake That Stops Every Trekker in Their Tracks

Which Is the Toughest Trek in Uttarakhand?

If you are trying to figure out the toughest trek in Uttarakhand, Kalindi Khal usually comes up first, but the real answer is not that simple because a few treks in this region push human limits in different ways. So let us clear this doubt straight away. There is no single “easy winner”, but if we judge honestly on altitude, glacier travel, technical sections, and isolation, Kalindi Khal Trek is widely accepted as the toughest trek in Uttarakhand. Still, Auden’s Col, Panpatia Col, and Chipla Kedar are right behind it, each brutal in their own style. Now if you are planning this seriously, think of this like a conversation over chai in Rishikesh before you head into the mountains. You need clarity, not confusion. What Actually Makes a Trek “Tough” in Uttarakhand? Before we name any trek as the toughest, we need to understand what “tough” really means in the Himalayas. It is not just height. Many beginners assume altitude is everything, but that is only one part of the story. A trek becomes difficult when multiple challenges stack together. Here is what truly matters: Thin air above 4500 metres slows your body down Long walking days without proper rest points Glacier crossings with unstable ice and rocks Weather that changes without warning Remote routes with no easy rescue options Now imagine all of this happening on the same trek for more than a week. That is where Uttarakhand’s hardest treks stand apart from normal Himalayan trails like the popular Kedarkantha trek. Why Kalindi Khal Is Considered the Toughest Trek in Uttarakhand Kalindi Khal is not a regular trekking route. It is an expedition that connects Gangotri to Badrinath, cutting through one of the most remote glacier zones in India. The reason it often wins the title of toughest trek in Uttarakhand is simple. It does not give you a break. The route includes long glacier walks, steep ascents, and high passes where even breathing feels heavy. You are constantly above 5000 metres for days, not hours. A typical Kalindi Khal crossing looks like this: Gangotri to Bhojbasa through rocky river valleys Bhojbasa to Gaumukh glacier zone Nandanvan and Vasuki Tal high camps Long glacier traverse near Kalindi Khal Pass Descent towards Mana and Badrinath The pass itself sits at around 5950 metres or nearly 19500 feet, which puts it in a very rare category of Indian Himalayan routes. For comparison, even popular summit treks like Kedarkantha summit climb feel very beginner-friendly in front of such expedition terrain. One of our trek leaders once said while camping near Vasuki Tal, “Yahaan par confidence bhi slow ho jaata hai.” That is exactly what happens when altitude starts working on your body. Toughest Trek in Uttarakhand Compared With Kedarkantha and Others Now let us settle the most common confusion. Many people compare the toughest treks with Kedarkantha, which is honestly not even in the same league. This is where the most difficult trek Uttarakhand Kedarkantha comparison becomes important. Kedarkantha is beautiful, safe, and perfect for beginners. You walk through pine forests, snowy camps, and gentle slopes. You enjoy the Himalayas there. But in Kalindi Khal or Auden’s Col, you survive the Himalayas first and enjoy them later. Let us break it down simply: Trek Difficulty Terrain Type Best For Kedarkantha Easy to Moderate Snow trails, forests First timers Har Ki Dun Moderate Valleys, villages Easy trekkers Bali Pass Difficult Mixed terrain Experienced trekkers Auden’s Col Very Difficult Glacier + technical ice Experts Kalindi Khal Extreme Long glacier expedition Highly trained trekkers If you want to understand how beginner-friendly Kedarkantha is before jumping into advanced treks, guides like Kedarkantha trek for beginners explain the gap very clearly. Kalindi Khal vs Auden’s Col vs Chipla Kedar Now comes the real debate that trekkers love. Auden’s Col is known for technical glacier walking and knife-edge ridges. Chipla Kedar is long, remote, and mentally draining. Kalindi Khal is higher, longer, and more continuous in difficulty. If we simplify it: Auden’s Col feels technical and sharp Chipla Kedar feels long and exhausting Kalindi Khal feels like everything combined in one journey That is why many guides quietly prefer Kalindi Khal when talking about overall toughness. It is not always the most technical, but it is the most complete test. Should You Even Think About This Trek Right Now? Let us be honest here. Most people reading about the toughest trek in Uttarakhand are not ready for Kalindi Khal today, and that is perfectly fine. This is not a motivational speech. It is reality. You should only consider such treks if you already have experience in: Treks above 4000 metres Long multi-day Himalayan routes Walking 6 to 8 hours daily without exhaustion Handling cold nights and basic survival conditions Fitness Reality for Tough Himalayan Treks Forget gym strength for a moment. High altitude fitness is different. Your body needs endurance more than power. A practical fitness benchmark looks like this: You can jog 4 to 5 km comfortably You can climb 10 to 12 floors without stopping You can walk 15 km on uneven terrain You can carry a 10 kg backpack for training hikes We have seen trekkers with strong gym bodies struggle badly at 5000 metres because their lungs were not trained for thin air. Why People Still Chase the Toughest Trek in Uttarakhand Even after knowing the risks, people still want it. Why? Because the Himalayas are not just scenery. They are personal tests. Standing near a glacier at 5000 metres, you are not thinking about ranking or popularity. You are thinking about breath, balance, and survival. That is why treks like Kalindi Khal attract serious trekkers, not casual tourists. Quick Reality Check Before You Decide Before planning anything, ask yourself: Do I have real high altitude experience Can I handle unpredictable weather for days Am I mentally ready for isolation Do I understand that turning back is normal If the answer is unclear, it is better to start smaller and build up slowly

Which Is the Toughest Trek in Uttarakhand? Read More »
Where Is Kedarkantha?

How to Get Fit for Kedarkantha Trek: The Complete Training Guide

If you’re wondering how to get fit for Kedarkantha trek, start preparing at least six weeks before your trek. Build your stamina with regular walking or jogging, strengthen your legs, train with a backpack, and improve your breathing. You do not need to be an athlete, but you should be fit enough to enjoy the climb instead of simply enduring it. The Kedarkantha Trek is often called one of the best beginner-friendly Himalayan treks, but that does not mean you can show up without preparation.  Every winter, we meet trekkers who think youth alone is enough. By the second day, they are out of breath on gentle climbs. At the same time, we also see people in their forties and fifties walk comfortably because they spent a few weeks preparing. Good fitness does not make the mountain easier. It simply allows you to enjoy every step instead of worrying about the next one. Why You Need to Train for Kedarkantha Trek Before starting your fitness plan, it helps to know what your body is preparing for. The Kedarkantha Trek is not a marathon, but it is still a Himalayan trek where you walk for several hours every day. Although it is considered an easy to moderate trek, understanding the actual Kedarkantha trek difficulty will help you prepare more realistically. Trek Detail What to Expect Trek Duration 4 to 5 Days Total Trek Distance Around 20 to 24 km Highest Altitude 12,500 ft (3,810 m) Daily Walking Time 4 to 6 hours Summit Day Around 7 to 8 hours of trekking Difficulty Level Easy to Moderate The summit day is the most demanding part of the journey. You usually begin before sunrise, climb steadily for nearly five hours, reach the summit, and descend on the same day. Your legs, lungs, and mind all need to work together. That is why endurance matters much more than speed. If you want to know exactly what this day feels like, read our detailed guide to Kedarkantha summit day. A Simple Fitness Test Before Your Trek Many people ask us, “How do I know if I am fit enough?” Instead of guessing, try this simple test one or two weeks before your departure. You are generally ready for Kedarkantha if you can: Walk or jog 5 km in 40 to 45 minutes without feeling completely exhausted. Climb 10 to 12 floors of stairs at a steady pace without taking long breaks. Carry a 5 kg backpack during a one-hour walk comfortably. Recover within a few minutes after finishing your workout. You do not need to achieve these goals on your first attempt. They simply give you a clear target while preparing. How to Get Fit for Kedarkantha Trek in 6 Weeks The biggest mistake beginners make is trying to do everything in one week. Your body needs time to adapt. A gradual six-week plan works far better than intense workouts just before the trek. Weeks 1 and 2: Build Your Base Your first goal is consistency. Even if you feel energetic, avoid pushing yourself too hard in the beginning. Build a routine that you can follow every week. Focus on: Brisk walking for 30 to 40 minutes. Light stretching after every walk. Climbing stairs for 10 to 15 minutes. Drinking enough water throughout the day. If you have a desk job, these small changes can improve your stamina surprisingly fast. Weeks 3 and 4: Build Strength Now your muscles are ready for extra work. The uphill climb to Kedarkantha demands strong thighs, calves, and hips. Strong legs also reduce knee pain during the descent. A simple routine is enough. 15 squats 10 lunges on each leg 20 step-ups on stairs 30-second plank Repeat three rounds Do one longer walk every weekend. Aim for 7 to 8 km without rushing. Each exercise prepares you for a specific part of the trek.  Squats help during long uphill sections. Step-ups copy the movement you repeat while climbing rocky trails. Planks improve stability when walking on uneven snow. Weeks 5 and 6: Train Like You Will Trek This is the stage where your confidence grows. Carry a backpack weighing around 4 to 6 kg during your practice walks. Wear the best shoes for Kedarkantha trek that you plan to use in the mountains. Small issues like shoe pressure or shoulder discomfort become obvious now instead of on the trek. If you can find a nearby hill, use it. If not, stairs remain one of the best training tools available. Cardio Is More Important Than Speed Many beginners think they need to run fast. That is not how mountain trekking works. A steady pace is far more useful than short bursts of speed. Your heart and lungs should keep working comfortably for several hours. Choose any activity you enjoy. Brisk walking Light jogging Cycling Swimming Skipping Aim for 30 to 45 minutes, four or five days every week. When you improve your cardio, the long climb to Juda Ka Talab and eventually the summit feels much more comfortable. Train Your Balance Too This is one area that many trekkers ignore. During winter, parts of the Kedarkantha trail remain covered with snow. Tree roots, rocks, and icy patches can make the ground uneven. Spend five minutes standing on one leg. Switch sides after thirty seconds. You can also practise slow side lunges. These simple exercises strengthen the smaller muscles around your ankles and knees, making every step more stable. Practise Walking with a Backpack A trekking backpack feels different from a school or office bag. Many first-time trekkers wear one for the first time on the actual trek. By lunchtime, their shoulders begin to ache. Train with the same backpack you plan to carry. Adjust the waist belt properly and keep the weight close to your back. Before leaving home, it is also worth checking a complete Kedarkantha trek packing list 2026 so you know exactly what your backpack should contain. Eat to Support Your Training Exercise creates stress on

How to Get Fit for Kedarkantha Trek: The Complete Training Guide Read More »

Kedarkantha Trek Package 2026

Kedarkantha Trek Challenges: Top 5 Problems & How to Solve Them

The Kedarkantha trek has a few real challenges, but most people can handle them with good planning, basic fitness and the right guidance. Many people hear that Kedarkantha is one of the easiest Himalayan summit treks. Because of that, they think there is nothing to worry about. That is not fully true. At 12,500 feet, you still face freezing weather, thin air, snowy trails and changing mountain weather. These are not reasons to skip the trek. They are simply reasons to prepare well. If you are still wondering whether this trek is right for you, checkout:  Kedarkantha Trek for Beginners. The good news is that this trek is planned in a way that gives your body time to adjust. Most first-time trekkers finish it without any major problem because they come prepared and listen to their trek leader. Kedarkantha Trek Challenges Problems Solutions: Know the Trek First It is much easier to deal with a challenge when you know what is coming. Trek Day Distance Main Challenge Day 1 Sankri to Juda Ka Talab (4 km) Easy walk through forests Day 2 Juda Ka Talab to Base Camp (3 km) More climbing and colder weather Day 3 Base Camp to Summit and back (6 to 7 km) Steep climb, snow and high altitude Day 4 Return trek Tired legs during descent Quick Facts Summit altitude: 12,500 ft (3,810 m) Trek duration: 4 to 6 days Total trekking distance: Around 20 km Summit day: 7 to 8 hours, with about 5 hours of climbing and 2 to 3 hours of descent Difficulty: Easy to Moderate.  These numbers look simple on paper. The mountain can still surprise you, so good preparation is always important. 1. Cold Weather Can Make You Tired Cold is the first thing most trekkers remember after they come back. In winter, camps usually stay between -5°C and -10°C. On summit morning, strong winds can make it feel close to -15°C. Your hands and feet may feel cold even when you are walking. Many beginners wear all their warm clothes before they start climbing. Soon they begin to sweat. When they stop for a break, the sweat cools down and makes them feel even colder. The better idea is to wear layers that you can remove or add while walking. A simple layering system keeps you warm without making you sweat.  Read our guide on the Kedarkantha trek layer system explains how to dress for the trek. 2. The Summit Climb Tests Your Mind Many people think the hardest part is climbing. In our experience, the bigger challenge is staying calm. The summit walk starts around 3 am. It is dark, cold and very quiet. Your sleeping bag feels much nicer than the trail outside. As you climb higher, you may wonder if you can really reach the top. We remember a young trekker from Pune who stopped after every few minutes. She was not hurt. She only felt nervous. The trek leader smiled and said, “Just take ten more steps.” She followed that advice. Ten steps became twenty. Then another twenty. Before she knew it, she was standing near the summit temple with a big smile on her face. That is how many people reach the summit. One step at a time. 3. High Altitude Can Affect Anyone Many people think only beginners get altitude sickness. That is not true. Even experienced trekkers can get Acute Mountain Sickness (AMS). The risk is lower on Kedarkantha because the climb is gradual, but it is still possible.  Watch for these signs: Headache Nausea Dizziness Loss of appetite Feeling very tired If you notice these symptoms, tell your trek leader straight away. Good trekking teams carry a first-aid kit and emergency oxygen. Most trekkers never need oxygen, but it is good to know that it is there if required. 4. Snow Is Not the Only Thing You Should Watch Fresh snow looks soft and beautiful. Ice can be much more dangerous. One type of ice is called verglas. It is a thin layer of clear ice that forms over rocks and frozen ground. It often looks like wet stone, so many people do not notice it until they step on it. The good news is that proper gear makes a big difference. Good trekking shoes, microspikes and trekking poles help you stay safe.  Mountain Weather Can Change Fast The weather in the Himalayas can change within a few hours. You may start the day under a clear blue sky and end it in light snowfall. Strong winds can also make the summit climb harder. Sometimes your trek leader may delay or even cancel the summit attempt because of bad weather. This can feel disappointing. But it is always the right decision if safety is at risk. A mountain will always be there. Your safety should always come first. One Challenge That Nobody Talks About Many trekkers compare themselves with others. Someone walks faster. Someone reaches every break point first. Someone never seems tired. It is easy to think you are slowing everyone down. The truth is different. Every person adjusts to cold, snow and altitude in their own way. We have seen many slow walkers reach the summit because they kept a steady pace from start to finish. How Kedarkantha Compares With Other Beginner Treks Many people compare Kedarkantha with Dayara Bugyal before booking a trek. Dayara Bugyal has gentler slopes for most of the journey. Kedarkantha saves its steepest climb for summit day. That is why reaching the top feels more rewarding.  Read our complete guide on: Kedarkantha vs Brahmatal Trek Simple Things That Solve Most Problems You do not need expensive gear or months of training. Small habits make a big difference. Walk or jog for a few weeks before the trek. Do squats and climb stairs to build leg strength. Wear your trekking shoes before the trip. Follow this Kedarkantha Trek Packing List 2026 so you do not forget important items. Drink water often. Carry an extra

Kedarkantha Trek Challenges: Top 5 Problems & How to Solve Them Read More »

How Many Days for Kedarkantha Trek

Kedarkantha Summit Climb: What the Final Push Feels Like

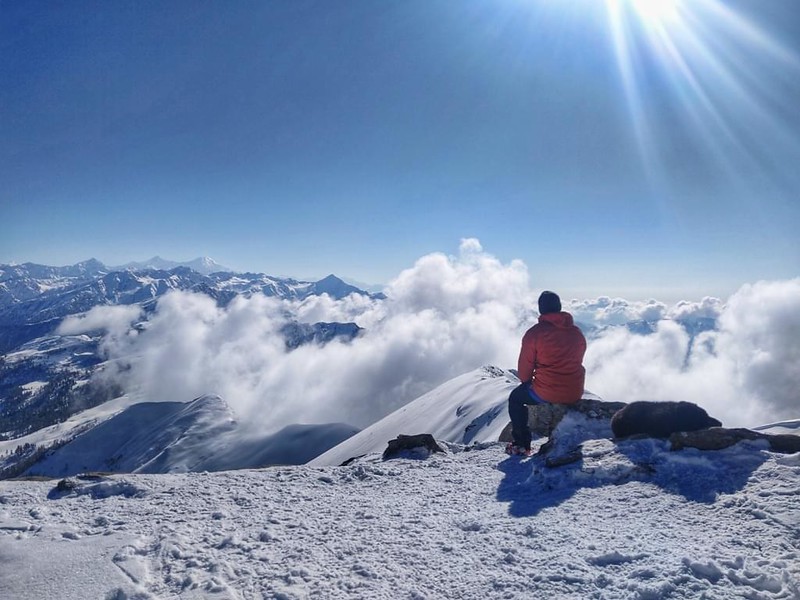
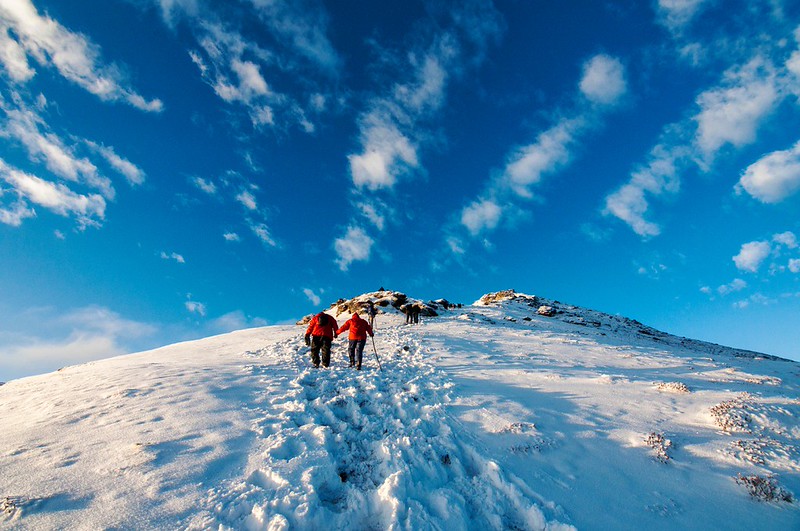
The final climb to the Kedarkantha summit is more of a mental challenge than a physical one. Your legs will feel tired, but it is your patience, rhythm and mindset that carry you through the last steep stretch to one of the most rewarding viewpoints in the Himalayas on the Kedarkantha Trek. Many first-time trekkers spend more time worrying about summit day than any other part of the trek. They wonder if the climb is too steep, whether they will be able to breathe comfortably at over 12,000 feet, or if they are fit enough to make it. Those questions are completely normal. The good news is that the summit push is achievable for most people with average fitness, especially if they understand the Kedarkantha trek difficulty beforehand and follow their trek leader’s guidance. Knowing what actually happens on summit morning removes much of the uncertainty. Once you understand the climb, you stop fearing it and start looking forward to it. Kedarkantha Summit Climb Experience: What to Expect Before talking about the emotions, it helps to know what summit day usually involves. Summit altitude: 12,500 ft (3,810 m) Starting point: Kedarkantha Base Camp Wake-up time: Usually between 2:30 am and 3:30 am Summit climb: Around 3 to 5 hours, depending on snow conditions and group pace Complete summit day: Approximately 6 to 8 hours including the descent Trail: Snow-covered in winter with some steep sections approaching a 40° to 50° incline Night temperature: Generally between -5°C and -10°C during peak winter, with colder spells possible Every batch experiences slightly different conditions. Fresh snowfall, group size and weather can all influence how quickly you reach the top.  Why the Final Push Feels Different From Every Other Day The summit climb is not dramatically longer than the previous trekking days. What makes it feel different is that several small challenges arrive together. You start after only a few hours of sleep. The air is thinner than at previous camps. Temperatures are at their lowest, and your body has already completed two or three days of trekking. Even simple tasks like tightening your backpack straps or drinking water feel slower because of the cold. If you’re worried about headaches or breathlessness during the trek, the altitude sickness on the Kedarkantha Trek is common. This combination is why many trekkers say the final push tests their mind more than their muscles. The Darkness Helps You Focus Summit day begins while the rest of the valley is still asleep. Headlamps switch on one by one, forming a glowing line through the forest. Your world suddenly becomes very small. You can only see a few metres ahead, while everything beyond remains hidden in darkness. Surprisingly, this works in your favour. Instead of worrying about the entire climb, you naturally focus on the next twenty or thirty steps. Most experienced trek leaders on Kedarkantha repeat the same advice throughout the ascent: “Small steps. Slow breathing. Don’t rush.” Simple words, but they work. The Steep Snow Slope Looks Harder Than It Feels The final section is the steepest part of the trek. During winter, the slope often reaches an incline of around 40 to 50 degrees, which can look intimidating when you first see it in your headlamp.  The key is not speed. We have seen trekkers who try to climb quickly because they are excited about reaching the summit. Within fifteen minutes they are exhausted. Others walk slowly, maintain a steady rhythm and rarely need long breaks. Mountain trekking rewards consistency, not competition. The Right Gear Makes a Bigger Difference Than Most Beginners Expect Confidence on summit day comes from preparation as much as fitness. Most organised trekking companies provide or recommend essential safety gear during winter, especially when snow covers the trail. Wearing the right layers and choosing the best shoes for Kedarkantha Trek can make the climb much safer and more comfortable. Carry or wear: Microspikes or crampons for better grip on icy sections. A trekking pole for balance during the climb and descent. Gaiters if fresh snow is deep. A headlamp with fresh batteries. Warm gloves and a proper layer system. An insulated water bottle to reduce freezing. When your footing feels secure, your mind becomes calmer too. Everyone Struggles a Little, Even If They Don’t Show It One thing first-time trekkers rarely expect is that the entire group slows down near the top. Some people stop every ten minutes for a short breather. Others quietly sip water before continuing. Trek leaders regularly check on everyone because keeping the group together is more important than reaching the summit first. This changes the atmosphere completely. Instead of racing ahead, people begin encouraging one another. A simple “You’ve got this” from another trekker often provides enough motivation for the next stretch. That shared struggle becomes one of the strongest memories of the entire trek. The Hardest Part Is Often Inside Your Head Almost everyone reaches a point where they question themselves. You may wonder whether another break is needed or whether you should keep moving. In our experience, a short pause of thirty to sixty seconds usually works better than sitting down for several minutes. Long breaks allow your body to cool rapidly in winter, making it harder to restart. Another helpful trick is to avoid looking all the way to the summit. The climb appears much longer than it actually is. Instead, focus on one section of the trail at a time. Before you realise it, the colourful prayer flags come into view. The summit is suddenly much closer than you imagined. The Sunrise Changes Everything As darkness fades, the mountains slowly begin to glow. Peaks like Swargarohini Peak, Bandarpoonch Peak and Black Peak catch the first golden light while the valleys remain hidden beneath a blanket of shadow. Many trekkers become unexpectedly quiet. Some smile. Some hug their friends. Others simply stand still and take in the view before reaching for their phones. No photograph fully captures what those final hours of effort

Kedarkantha Summit Climb: What the Final Push Feels Like Read More »

Juda Ka Talab The Frozen Lake That Stops Every Trekker in Their Tracks

The Sense of Accomplishment After Kedarkantha Summit: Why It Changes You

The real reward of reaching the Kedarkantha summit is not the panoramic mountain view. It is the quiet confidence that comes from proving to yourself that you can do something you once thought was beyond your limits. Many people sign up for the Kedarkantha Trek expecting beautiful snow, dense pine forests and unforgettable sunrises. They return talking about something entirely different. Ask them what stayed with them the most, and chances are they will smile and say, “I still can’t believe I reached the summit.” That feeling is difficult to explain until you experience it yourself. It lasts much longer than the trek and often becomes the reason people fall in love with the Himalayas. Kedarkantha Summit at a Glance Before we talk about the emotions, it helps to understand what makes this summit special. Summit altitude: 12,500 ft (3,810 m) Trek distance: Around 20 km round trip Duration: Usually 4 to 6 days Difficulty: Easy to Moderate, making it a great choice for first-timers. Best season: December to April for snow, with December and January offering the classic winter experience. These numbers may look ordinary on paper. Walking those kilometres through snow, climbing steadily in freezing temperatures, and reaching the summit before sunrise tells a very different story. Why Reaching the Kedarkantha Summit Feels Like a Personal Victory Unlike many achievements in daily life, nobody hands you an award when you reach the top. There is no finish line, no cheering crowd and no certificate waiting at the summit. Instead, there is silence. As you stand at 12,500 feet, surrounded by the Garhwal Himalayas, you realise that every step was earned. The mountain never made the climb easy, yet it never asked for anything except patience and determination.  Since the summit sits above 12,000 feet, it is also worth understanding altitude sickness on the Kedarkantha Trek before your journey. That is what makes the achievement feel so personal. The journey is not about competing with anyone else. It is about winning a small battle with yourself. The Summit Morning Begins Long Before Sunrise One of the most memorable parts of the trek starts when most people are still asleep. Your trek leader wakes everyone around 2 or 3 am. The campsite is silent except for the sound of zips opening and trekking boots being tightened. Your water bottle may have a thin layer of ice. Even putting on gloves feels like a task because of the cold. Headlamps switch on one by one, forming a glowing line through the forest. For the next few hours, you climb under a sky full of stars. There are very few conversations because everyone is saving energy for the final ascent. This early morning climb is often where the real challenge begins. Read the complete guide to: Kedarkantha summit day. The Final Stretch Tests Your Mind More Than Your Legs Most trekkers expect the summit day to be physically demanding. What surprises them is how much of the climb is mental. The trail becomes steeper. The air feels thinner. You may find yourself stopping every few minutes to catch your breath. We have often seen first-time trekkers ask the same question. “How much farther?” The answer is usually, “Just a little more.” Sometimes that “little more” feels endless. Yet every short break gives you enough strength to continue. Around twenty minutes before the summit, something changes. You begin to notice colourful prayer flags fluttering in the distance. The excitement quietly replaces the tiredness, and suddenly your pace picks up without you even realising it. That moment stays with people long after the trek ends. The Sunrise Makes You Pause Without Saying a Word The view from Kedarkantha is breathtaking, but it is not breathtaking because it is famous. It is breathtaking because you worked for it. As the first rays of sunlight spread across the mountains, peaks like Swargarohini, Bandarpoonch, Black Peak (Kalanag) and parts of the Gangotri and Yamunotri ranges slowly glow in shades of gold. If you’re curious about every mountain visible from the top, explore the peaks visible from Kedarkantha summit. Many trekkers stop taking photographs for a few minutes. Not because they forget. Because they simply want to look. No camera truly captures the feeling of standing above the clouds after hours of climbing in the dark.  The Best Moments Are Often the Ones Nobody Plans Some of the strongest memories from Kedarkantha are not the ones you expect. They happen naturally. Sharing a chocolate with someone who is running low on energy. Hearing your group cheer as the last trekker reaches the summit. Watching strangers hug each other after completing their first Himalayan trek. Standing quietly for a minute before taking any photographs. Smiling at your trek leader because you finally understand why they kept saying, “It will all be worth it.” These moments remind you that the summit is not only about reaching the highest point. It is also about sharing the journey with people who started as strangers and often leave as friends. Is the Kedarkantha Summit Worth the Effort? If you are wondering whether the climb is worth waking up in the freezing cold, the answer is yes for most people. Not because the trek is easy. Because the effort gives meaning to the experience. If someone dropped you at the summit by helicopter, you would admire the view. But you would never feel the same pride. Every steep climb, every cold morning and every slow step towards the top becomes part of the reward. Carrying the right gear, especially a quality sleeping bag for Kedarkantha, also makes the experience far more comfortable during cold summit nights. That is why so many trekkers say the descent feels easier. The mountain has already given them what they came looking for, even if they did not know it at the beginning. If you’re still deciding whether this should be your first Himalayan adventure, must know about Kedarkantha is the best first summit trek in India.

The Sense of Accomplishment After Kedarkantha Summit: Why It Changes You Read More »

Where Is Kedarkantha?

Trek Leaders on Kedarkantha: What They Do, Carry & Provide

If you want a safe and enjoyable Kedarkantha Trek, a good trek leader matters as much as good trekking shoes. They are the person who keeps the group safe, reads the mountain, and makes the right call when plans need to change. Many people book the trek after checking the price, snowfall photos, and campsite views. Very few stop and ask, “Who is leading my trek?” Yet that one question can make a bigger difference than the brand of jacket you pack. The Himalayas reward good decisions and punish careless ones. A skilled trek leader helps you make more of the first and less of the second. Think about your first day in Sankri village. You have travelled for hours, you are excited, and all you want is to start walking. Your trek leader is thinking about something else. They are checking the weather, speaking with the local support team, confirming permits, and making sure every trekker is ready for the trail. Their work starts long before the first step and ends only after everyone reaches home safely. Also read here about: Kedarkantha Solo Trek Kedarkantha Trek Leaders Role Responsibilities The kedarkantha trek leaders role responsibilities go far beyond showing the trail. They plan each day, watch every trekker, manage risks, and keep the group moving at a safe pace. Most of their work happens quietly, which is why many people never notice it until something unexpected happens. That is true, but beginner friendly does not mean risk free. The trail climbs from about 6,400 feet at Sankri to nearly 12,500 feet at the summit in four trekking days. That is enough altitude for some people to feel breathless, tired, or develop mild symptoms of Acute Mountain Sickness, even if they exercise every week. This is exactly why experienced leaders never rush the group. You may feel strong and want to walk faster. Someone else may be struggling quietly at the back. A good leader notices both. They slow the pace when needed because reaching the summit means little if someone falls sick along the way. Most reputed trekking companies appoint leaders who have completed recognised mountaineering courses like Basic Mountaineering Course (BMC) at NIM Uttarkashi, and advanced certifications like AMC, MOI, and Wilderness First Aid. Also read: Kedarkantha with family & Kids What Does a Trek Leader Actually Do? Many first-time trekkers think the leader simply walks ahead while everyone follows. Spend one day in the mountains and you will realise that is only a small part of the job. The role begins before anyone leaves Sankri. Your leader checks whether you have the best shoes for the Kedarkantha trek, whether backpacks fit properly, and whether everyone carries enough water. Small mistakes at the base often become big problems higher up. Once the trek begins, the leader watches the trail and people at the same time. Imagine guiding fifteen trekkers through snow while tracking weather changes and group energy levels. During the trek, leaders: Maintain a steady group pace Choose safe rest points Monitor fatigue and AMS signs Decide when microspikes are needed Adjust plans based on weather At camp, the work continues quietly while trekkers rest. Preparation for the Kedarkantha summit day often begins the previous evening. Why Do Trek Leaders Keep Asking You to Slow Down? This is one question almost every beginner asks. You may feel fresh and wonder why the leader keeps saying “slow down.” The answer is simple. Your lungs do not care about excitement. At altitude, walking fast drains energy quickly. You breathe more, drink less water, and tire early. Leaders have seen this pattern hundreds of times. That is why they keep repeating one thing: steady steps win the mountain, not fast ones. What Safety Gear Does a Trek Leader Carry? Every item in a trek leader’s backpack has a purpose. Nothing is random. Most leaders carry or manage: First aid kit Pulse oximeter Emergency oxygen cylinder Emergency blanket Navigation tools Headlamp with batteries Communication device Repair kit Emergency rope This becomes critical in winter conditions. Snow can hide ice underneath, and simple slopes can become risky without grip. The leader decides when microspikes are needed instead of forcing everyone to wear them all day. Timing matters more than equipment itself. How Trek Leaders Handle Altitude Sickness One of the most important responsibilities is identifying altitude sickness on Kedarkantha trek early. Symptoms can appear in anyone, not just beginners or unfit trekkers. Fitness does not guarantee altitude response. Leaders watch for: Headache that does not go away Loss of appetite Dizziness Extreme fatigue Breathlessness at rest When needed, they slow the group, monitor oxygen levels, and sometimes decide descent. The summit is always optional. Safety is not. What Happens If Someone Needs Help? If someone gets unwell, the leader first provides immediate support and monitors the situation. If required, oxygen is used and the group moves down in a controlled way. Most descents follow the route back towards Sankri village, where road access is available for further medical help. This is part of standard planning, not panic response. Good teams never rely only on mobile networks because coverage becomes unreliable as altitude increases. What Trek Leaders Do Not Do A trek leader guides, but they do not carry the trek for you. You still need to: Carry your own backpack Drink enough water Wear proper layers Speak up when unwell Follow instructions Maintain group discipline Silence is risky in the mountains. Even small discomfort matters. How to Choose a Trek Operator with Good Leaders Before booking a Kedarkantha trek package, ask about leadership quality, not just price. Check: BMC certification Wilderness First Aid training Oxygen availability Group size ratio Emergency plan Support staff strength Smaller groups usually mean better attention and safer decisions. Why Great Trek Leaders Stay in Memory People remember snow peaks, but they also remember the person who guided them there safely. The leader who slowed the group before exhaustion.The leader who noticed early sickness signs.The leader who

Trek Leaders on Kedarkantha: What They Do, Carry & Provide Read More »

kedarkantha trek

How to Start the Kedarkantha Trek: Day-of Logistics from Hotel to Trail

The start the Kedarkantha trek day one logistics are straightforward when you know the sequence. Reach Sankri the evening before your trek, complete the necessary formalities, organise your gear, get a good night’s sleep, and begin walking after breakfast with your trek leader the next morning.  If you’re planning your Kedarkantha Trek, understanding these logistics will help you enjoy a smooth start. Many first-time trekkers think Day 1 of Kedarkantha trek begins when they step onto the trail. In reality, it starts the moment they arrive in Sankri. A little planning on the previous evening makes the first trekking day feel relaxed instead of rushed. We have often seen trekkers arrive at Sankri tired after the long drive from Dehradun, only to realise that spending a few extra minutes preparing the night before makes the next morning much smoother. Why Reaching Sankri a Day Early Makes a Big Difference Most trekkers travel from Dehradun to Sankri, a journey of around 190 to 200 kilometres that usually takes 8 to 10 hours, depending on road conditions and traffic.  Read this complete guide on: How to Reach Kedarkantha Trek The drive itself is long enough to leave you tired. Starting a mountain trek immediately afterwards increases fatigue and takes away the excitement of the experience. Reaching Sankri a day early gives you time to rest, settle into the mountain weather and begin the trek with fresh legs.  Choosing the right place to stay in Sankri also makes your first trekking morning much more comfortable. Complete the Important Formalities First Before the trek begins, your trek operator usually completes the registration required for the Govind Pashu Vihar National Park area. This process is simple, but you should keep your government-issued photo ID handy instead of packing it deep inside your backpack.  You can also learn more about the protected Govind Pashu Vihar Wildlife Sanctuary that you’ll be trekking through. Carry one of these documents: Aadhaar Card Driving Licence Passport (for foreign nationals) Any other valid government photo ID accepted by your trek operator Once these formalities are complete, you can focus entirely on enjoying the trek. Don’t Forget Cash Before You Reach the Trail One of the most common mistakes first-time trekkers make is assuming that digital payments work everywhere. Although some shops in Sankri accept online payments, network connectivity can be unreliable. It is always safer to carry enough cash for snacks, small purchases and emergencies. The last dependable ATM is usually at Purola, so withdraw money before continuing towards Sankri if needed. You may not use the cash, but you’ll be glad you carried it if the network stops working. Pack Your Backpack the Night Before The evening before the trek is much calmer than the next morning. Use that time wisely. Instead of waking up early to search for gloves or medicines, organise everything before going to bed.  This simple habit saves time and helps you leave your hotel without unnecessary stress. Following a proper Kedarkantha Trek Packing List ensures you don’t miss any essential gear. A quick evening checklist helps: Charge your phone and power bank. Fill your water bottles. Keep tomorrow’s trekking clothes ready. Pack your daypack completely. Sleep early because the trek starts soon after breakfast. What Happens on the Morning of Day 1? Most trekking groups begin their day between 6:00 AM and 8:00 AM, depending on the season. After breakfast, your trek leader gathers everyone for a short briefing. This includes the day’s route, expected weather, safety instructions and a final gear inspection.  If your backpack feels uncomfortable or your trekking poles need adjustment, this is the best time to sort everything out. Nobody enjoys stopping every fifteen minutes just to fix loose straps. A Typical Day 1 Schedule Although timings vary slightly, most groups follow a similar routine. Time Activity 6:00–7:00 AM Wake up and freshen up 7:00–8:00 AM Breakfast and final packing 8:00–8:30 AM Registration check, briefing and gear inspection Around 8:30–9:00 AM Start trekking from Sankri Afternoon Reach Juda Ka Talab campsite The pace is relaxed because Day 1 is designed to help your body adjust gradually. Leave Extra Luggage Behind If you’re returning to the same guesthouse after the trek, most hotels and homestays in Sankri will safely store luggage that you don’t need on the mountain. This is especially useful if you’ve travelled from another city with extra clothes or souvenirs.  Carry only your trekking essentials. A lighter backpack makes the first day’s climb much more enjoyable. If you’re joining an organised trek, your duffel bag is usually carried separately by support staff or porters while you carry only your daypack. Mobile Network Becomes Limited Quickly Many trekkers worry about charging their phones, but the bigger issue is network coverage. Most mobile networks become weak around Sankri and are generally unavailable once you’re on the trekking trail.  Let your family know in advance that you may not be able to call or reply to messages until you return. Many trekkers actually enjoy this natural digital detox on the Kedarkantha Trek after spending months connected to screens. The Walk from Sankri Starts Gently One reason Kedarkantha is considered beginner friendly is that the first day’s trail allows you to settle into a comfortable rhythm. The path leaves Sankri and enters beautiful pine and oak forests before reaching Juda Ka Talab.  Wooden bridges, small streams and birdsong replace traffic noise within minutes. The climb is gradual, giving your body time to warm up naturally rather than forcing you into a steep ascent. Many trekkers are surprised by how peaceful the first few kilometres feel. Walk at Your Own Pace Every trekking group has someone who rushes ahead during the first hour. By afternoon, that same person is often asking for extra breaks. A steady pace almost always works better than trying to impress others. Trekking is about endurance, not speed. Save your energy for the summit instead of spending it all on the first day. Reaching Juda Ka Talab Feels Like

How to Start the Kedarkantha Trek: Day-of Logistics from Hotel to Trail Read More »

Kotgaon Village The Hidden Gem That Starts the Kedarkantha Journey

Why Kedarkantha’s Gradual Ascent Makes It the Most Beginner-Friendly Summit

If you’re wondering whether the Kedarkantha gradual ascent beginner friendly reputation is deserved, the answer is yes. The trek climbs from about 6,400 ft in Sankri to 12,500 ft at the summit over four days, allowing your body to adjust steadily instead of facing a sudden jump in altitude.  If you’re planning your Kedarkantha Trek, this gradual climb is one of the biggest reasons it is recommended for first-time Himalayan trekkers. For many people, Kedarkantha is their first Himalayan trek. The excitement is real, but so are the doubts. Will I get tired? Can I handle the altitude? Is the summit too difficult? These are common questions, and they deserve honest answers rather than empty promises. Also read about: Our trek leaders on Kedarkantha  Why Kedarkantha’s Gradual Ascent Makes It Beginner Friendly The biggest reason beginners enjoy Kedarkantha is its well-planned ascent profile. Instead of climbing thousands of feet in a single day, the route spreads the elevation gain across multiple trekking days. From Sankri (6,400 ft), the trail passes through Juda Ka Talab, reaches Kedarkantha Base Camp, and finally climbs to the summit at around 12,500 ft. This gradual increase gives your muscles, lungs and energy levels time to adapt naturally. Unlike some Himalayan treks where the first day feels exhausting, Kedarkantha starts gently. You walk through forests, open meadows and snowy trails before reaching higher camps. The changing landscape also keeps the journey interesting, so you rarely feel like you’re walking the same terrain all day. Day-wise Ascent at a Glance Day Route Distance Time Altitude Gain Day 1 Sankri to Juda Ka Talab 4 km 4–5 hours 6,400 ft to 9,100 ft Day 2 Juda Ka Talab to Kedarkantha Base Camp 4 km 3–4 hours 9,100 ft to 11,200 ft Day 3 Base Camp to Kedarkantha Summit, then descend to Hargaon 6 km 6–7 hours 11,200 ft to 12,500 ft Day 4 Hargaon to Sankri 6 km 4–5 hours Mostly downhill Looking at the itinerary, you can see why the climb feels manageable. The altitude gain is divided across several days instead of being rushed into one long push. The Summit Day is Steeper, But You’re Ready for It It is important to set realistic expectations. Kedarkantha is beginner friendly, but the final climb to the summit is still the toughest part of the trek. The last stretch before the summit is noticeably steeper than the previous days. During winter, fresh snow can make this section slower, and you’ll need to focus on your footing. The good news is that you’ve already spent two nights at higher camps. Your body has adjusted to the altitude, and your legs have settled into a trekking rhythm. Most first-time trekkers find the summit climb challenging but achievable. Reaching the top after a steady ascent feels far more rewarding than being pushed into a difficult climb on the very first day. Read our detailed guide on:Kedarkantha Summit Day. How the Gradual Ascent Helps Your Body Many beginners worry more about altitude than walking distance, and that is understandable. A gradual climb gives your body time to adapt to lower oxygen levels. While no trek can completely eliminate the risk of Acute Mountain Sickness (AMS), slower altitude gain reduces the chances for many trekkers.  If you’d like to understand the symptoms, prevention and treatment in detail, read our guide on: Altitude Sickness on Kedarkantha Trek. To help your body adjust, remember to: Drink at least 2 to 3 litres of water every day. Eat regular meals even if your appetite feels low. Walk at a comfortable pace instead of rushing ahead. Tell your trek leader immediately if you develop a persistent headache, nausea or dizziness. Simple habits like these often make a bigger difference than trying to walk faster. Every Campsite Adds to the Experience One reason we recommend Kedarkantha to first-time trekkers is that every campsite feels different. Juda Ka Talab welcomes you with a peaceful forest setting, especially beautiful after fresh snowfall.  Kedarkantha Base Camp opens up wide mountain views, making you feel like you’re finally in the heart of the Himalayas. After the summit, the trail towards Hargaon offers another perspective of the surrounding valleys. Instead of simply moving from one stop to another, each campsite becomes part of the adventure. The Summit Rewards Every Step Standing on the summit is about much more than reaching 12,500 feet. As the sun rises, you’ll often see famous Himalayan peaks like Swargarohini, Bandarpoonch and Black Peak glowing in the early morning light. If you’d like to identify each mountain, must explore Peaks Visible from Kedarkantha Summit. It is one of those views that photographs never fully capture. Many trekkers start this journey wondering whether they can finish it. By summit morning, those same people are already talking about which Himalayan trek they want to do next. Why Kedarkantha Feels Easier Than Many Other Himalayan Treks Compared with demanding Himalayan routes such as Bali Pass or Rupin Pass, Kedarkantha has shorter trekking days, better-spaced campsites and a more forgiving ascent profile. That does not mean it is effortless. You’ll still walk in snow, climb uphill and deal with cold weather. Winter temperatures can fall below -10°C at night, so proper clothing is essential. The difference is that Kedarkantha introduces these challenges gradually instead of throwing everything at you on the first day. A Few Kedarkantha-Specific Tips A little preparation makes the experience much more enjoyable. Practice walking or climbing stairs for three to four weeks before your trek. Keep your water bottle inside your sleeping bag during very cold nights to prevent it from freezing. Choosing the right sleeping bag for Kedarkantha also helps you stay warm throughout the night. Carry trekking poles if you’re visiting after fresh snowfall. Follow a slow and steady pace. The mountains reward consistency, not speed. Pack warm gloves and dry socks because winter mornings can be extremely cold. A good pair of waterproof trekking boots is equally important, so don’t miss our guide to the

Why Kedarkantha’s Gradual Ascent Makes It the Most Beginner-Friendly Summit Read More »

Juda Ka Talab The Frozen Lake That Stops Every Trekker in Their Tracks

Wide Open Campsites on Kedarkantha: Why the Clearings Are Half the Magic

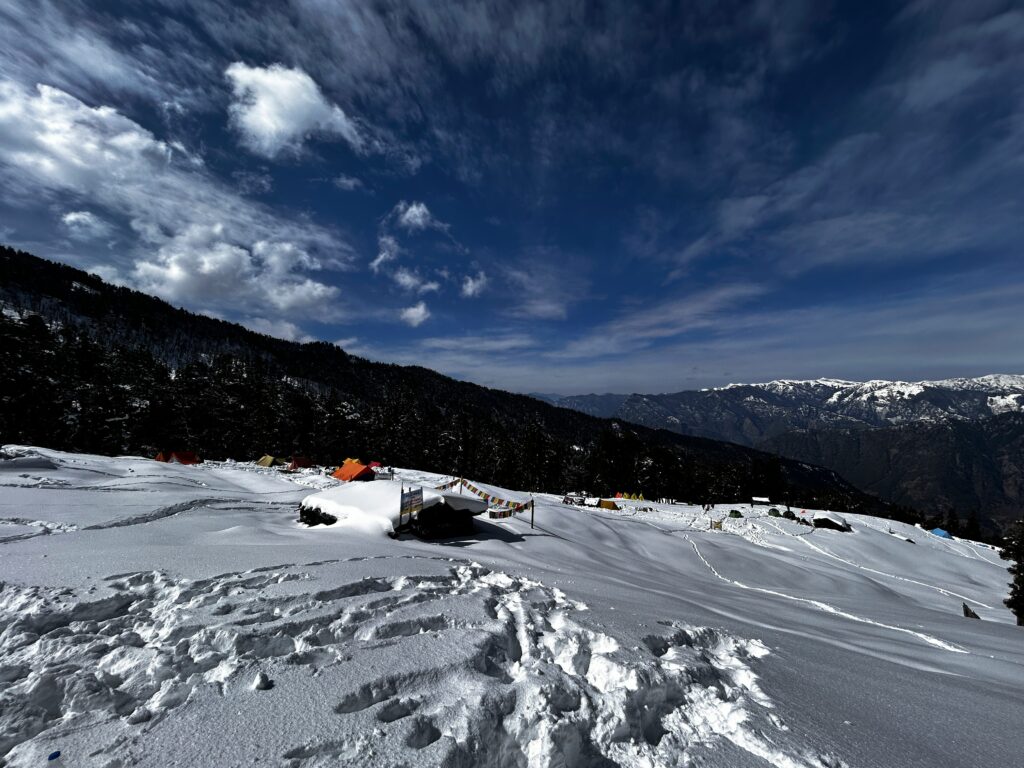
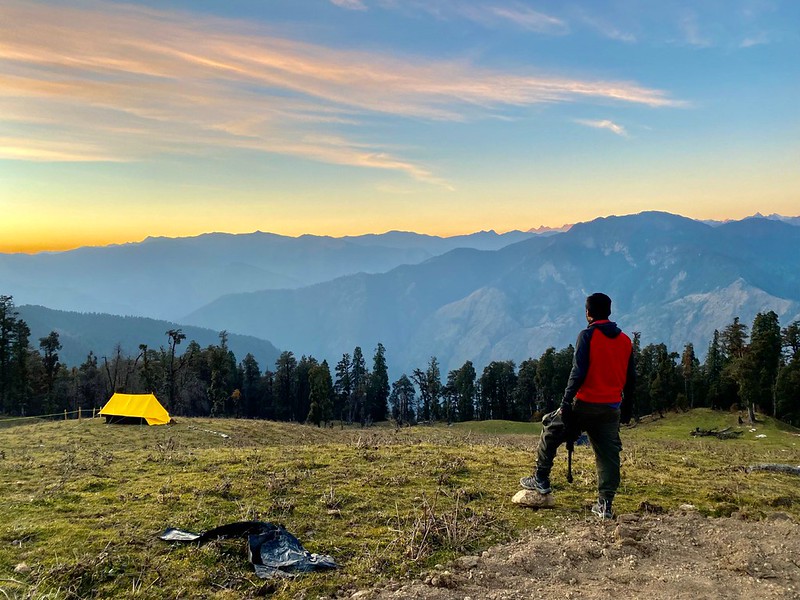
If you are wondering if the campsites on the Kedarkantha Trek are as special as the summit, the answer is yes. The wide open campsites are one of the best parts of the trek. They give you peaceful forests, open meadows, big mountain views, and clear Kedarkantha night skies that stay in your memory long after the trip ends. Most people book the trek because they want to stand on the summit. They imagine snowy peaks all around them. That moment is exciting, especially on Kedarkantha summit day. Still, it lasts only a short time. The campsites stay with you longer because you spend your evenings there, watching the mountains change as the day comes to an end. We have seen many trekkers become quiet after reaching camp. They are not only tired. They are taking in the beauty around them. One person walks to watch the sunset. Another enjoys a cup of hot tea. Someone else sits on a rock and looks at the snow-covered peaks. These simple moments often become the best part of the journey. Also read here about: The trek route Why Kedarkantha Wide Open Campsites Clearings Feel Different Many Himalayan treks have camps inside thick forests. Kedarkantha is different. After walking through the pine and oak forests of Kedarkantha, you suddenly reach a wide open clearing. The sky looks bigger, and the mountains seem much closer. This change feels special. You leave the quiet forest behind and step into an open space with amazing views. Snowy peaks stand all around you. The tents look small against the huge mountains. It reminds you how beautiful and vast the Himalayas really are. The campsites also feel open and comfortable. Even when many trekking groups stay there, the place does not feel crowded. You have enough room to walk, relax, or click photos without getting in anyone’s way. The Campsites Are More Than a Place to Sleep Many people think a campsite is only for resting at night. That is not true on Kedarkantha. The campsite becomes your home after a long day on the trail. You know what to expect. Once you reach camp, you remove your backpack, take a deep breath, and enjoy the cool mountain air. A hot cup of tea tastes even better after hours of walking. Instead of going straight into your tent, most trekkers spend time outside. They watch the evening light fall on the peaks. They talk with new friends or simply enjoy the silence. That is what makes these camps so special. Kedarkantha Campsite Clearings, Meadows, Stargazing and Wide Views These open campsites give you much more than a place to stay. They offer green meadows, fresh air, and wide mountain views. Every campsite has its own charm. During the day, the open ground fills with sunshine. Children play in the snow. Trekkers dry their gloves and jackets after the morning walk. As the sun sets, the mountains slowly change from white to golden and then to soft shades of pink. When night falls, the sky becomes the main attraction. There are very few lights in the area, so you can see thousands of stars on a clear night. Kedarkantha night sky is one of the most beautiful experiences on the trek. Many people think the summit is the best part of Kedarkantha. We feel the campsites deserve the same love because they help you slow down and enjoy the mountains. Every Campsite Has Its Own Charm No two campsites on Kedarkantha feel the same. As you follow the Kedarkantha trek itinerary, the views keep changing, making each day feel fresh. One campsite may be close to tall pine trees. Another may open towards snowy peaks. Some camps look over wide meadows, while others give you quiet forest views. Here are a few things that make these campsites special: Big open spaces with plenty of room. Tall pine and oak forests all around. Beautiful sunrise and sunset views. Snow-covered landscapes in winter. Great places for Kedarkantha trek photography. Peaceful surroundings with very little noise. Clear night skies that are perfect for stargazing. Each campsite feels different, and that keeps the trek exciting. Why Beginners Love These Camps Many first-time trekkers worry about camping in the mountains. They think the camps will be crowded or uncomfortable. Kedarkantha often proves them wrong. The campsites are wide and peaceful. There is enough space for everyone. Children can play nearby, and adults can take short walks before dinner. Even experienced trekkers enjoy these open spaces. After walking for hours, it feels good to stretch, relax, and enjoy the quiet mountain evening. When Do These Camps Look Their Best? The campsites change with every season. Winter is the favourite because fresh snow covers the ground. If you are planning your trip, check the best time to visit the Kedarkantha trek before you book. Spring brings green grass and blooming flowers. Autumn gives you clear skies and sharp mountain views. Every season has something special to offer. Try to reach camp before sunset. Watching the last light fall on the snowy peaks is a moment you will always remember. Make Every Evening Count After dinner, it is easy to crawl into your tent. Sometimes that is the right choice. Still, if you have a warm sleeping bag for Kedarkantha, spend a little more time outside before sleeping. Walk around the campsite. Watch the sunset over the mountains. Sit with a cup of hot tea. Look up and enjoy the stars. Share stories with your fellow trekkers. The summit may be the reason you book the trek, but the wide open campsites are often the reason you want to come back.

Wide Open Campsites on Kedarkantha: Why the Clearings Are Half the Magic Read More »

Kedarkantha Trek in December

Frozen Lake on Kedarkantha: When Is Juda Ka Talab Actually Frozen?

Yes, Juda Ka Talab usually starts freezing in late December, becomes largely frozen in January, and often stays partially frozen through early February, depending on snowfall and winter temperatures. Many people book the Kedarkantha Trek after seeing photographs of a frozen Himalayan lake surrounded by snow-covered forests. Then the obvious question comes up. Will Juda Ka Talab actually be frozen during your trek? The answer depends on when you visit and how harsh the winter has been that year. Some trekkers arrive to find a thin sheet of ice near the edges. Others reach the campsite during peak winter and see a lake that looks almost completely frozen. If a frozen lake is one of the main reasons you are choosing Kedarkantha, it helps to understand exactly when and why the lake freezes. What Is Juda Ka Talab? Juda Ka Talab is a small natural lake located at an altitude of about 2,700 metres (8,850 feet). It sits roughly 4 to 5 kilometres from Sankri and serves as the first major campsite on the Kedarkantha trek. Most trekking groups reach the lake within three to four hours of leaving Sankri. The route passes through dense pine and oak forests of Kedarkantha before opening into a beautiful clearing around the lake. For many trekkers, this campsite becomes the highlight of the journey. The forest setting feels peaceful, especially after leaving behind busy towns and city traffic. That is why the frozen lake attracts so much attention every winter. Also read here about: Kedarkantha route map Why Is It Called Juda Ka Talab? Locals have shared stories about the lake for generations. One popular explanation is that the lake often appears like two water bodies connected together. The word “Juda” means joined or connected, which is believed to have inspired the name Juda Ka Talab. Another story links the lake to Lord Shiva. According to local folklore, Lord Shiva once untied a portion of his hair in this region. Water is believed to have fallen from his locks and collected here, eventually forming the lake. Whether you see it as mythology or local heritage, the story adds another layer of charm to the place. Many trekkers hear this legend for the first time while sitting beside the lake after reaching camp. Frozen Lake Kedarkantha Juda Ka Talab When Does It Freeze? The freezing process happens gradually. The lake does not suddenly turn into solid ice after the first snowfall. Several cold nights are needed before ice starts forming across larger sections of the water. A typical winter pattern looks like this: Early December: Mostly open water Mid to Late December: Ice begins forming near the edges January: Usually the most frozen period Early February: Significant ice cover often remains Late February: Ice starts breaking up and melting March: Most frozen sections disappear Every winter behaves differently. Heavy snowfall can speed up freezing. A warmer season may delay it. That is why photographs from one year may not perfectly match conditions during another year. If you are planning a Kedarkantha trek in December or a Kedarkantha trek in January, checking recent weather reports always helps. Also read here: the wide open campsites How Cold Does It Get Around Juda Ka Talab? Temperature plays the biggest role in freezing conditions. During peak winter, daytime temperatures around Juda Ka Talab often range between 4°C and 10°C. Night temperatures regularly drop below freezing and may fall to -5°C or even lower during cold spells. Some severe winters have recorded temperatures close to -10°C around the campsite area. These freezing nights gradually build the ice layer that trekkers come to see. When people ask when the lake freezes, the real answer is simple. The colder the nights remain for several days in a row, the stronger the ice formation becomes. How Frozen Does the Lake Actually Get? This is where social media can sometimes create unrealistic expectations. Many people imagine a frozen lake that looks like a skating rink. Juda Ka Talab rarely looks that uniform. Some sections freeze more completely than others. Snow can cover parts of the surface and make the entire lake appear frozen from a distance. Underneath, conditions may vary. The appearance also changes during the day. Early mornings are usually colder and offer the most impressive frozen views. By afternoon, sunlight can soften ice near the edges. Is January the Best Month to See a Frozen Lake? For most trekkers, yes. January combines the coldest temperatures with the highest chance of snow accumulation. This creates the best conditions for ice formation. We often notice that trekkers visiting in January experience the winter scenery they imagined while planning the trip. Snow-covered trees, frozen sections of the lake and white campsites usually come together during this period. Nature never offers guarantees. Still, January gives you the highest probability. It is also one reason Kedarkantha consistently ranks among the best winter treks in India. Can You Walk on the Frozen Lake? This is one of the most debated topics on the trek. Some trek operators allow people to step onto frozen sections when conditions appear stable. Many online photographs show trekkers standing on parts of the ice. At the same time, experienced trek leaders often advise caution. The reason is simple. Ice thickness is not always consistent across the lake. One section may feel solid while another remains weaker underneath. Snow can also hide thinner areas. If your group leader advises against walking on the ice, it is usually based on safety rather than caution for its own sake. The frozen lake is beautiful to admire even from the shoreline. What Does the Frozen Lake Look Like at Sunrise? This is often the moment people remember long after the trek ends. Before sunrise, the campsite feels silent. Frost covers tents. Water bottles sometimes develop a thin layer of ice overnight. Then the first light reaches the forest. The snow begins to glow. Frost sparkles on branches. Frozen sections of the lake reflect soft shades

Frozen Lake on Kedarkantha: When Is Juda Ka Talab Actually Frozen? Read More »