Uncategorized

Kedarkantha Trek Fitness Target

Kedarkantha Trek Fitness Target: Can You Run 5 km in 48 Minutes?

Yes. If you can cover 5 km in 48 minutes, you meet the fitness benchmark used by Indiahikes for Kedarkantha. But there is one important point: this is not a universal rule for every Kedarkantha operator. Fitness tests can vary by trekking company, so you should always check the rules of the operator you book with. The 48-minute target means a pace of about 9 minutes 36 seconds per kilometre. You do not need to sprint. The real aim is to keep moving at a steady pace without long breaks. If you are searching for the Kedarkantha trek fitness target of 5 km in 48 minutes, you are likely trying to answer a very simple question: “Am I fit enough to go?” The answer depends on more than your 5 km time. Your legs, stamina, walking speed and ability to climb for hours also matter. Is 5 km in 48 Minutes a Kedarkantha Fitness Requirement? For Indiahikes, yes. Their Kedarkantha guidance lists a 5 km fitness benchmark, and their current Kedarkantha information also has a separate treadmill test requirement for trekkers above 58. That distinction matters. If you are booking with Indiahikes, do not treat 48 minutes as just a nice training goal. It forms part of their fitness process. If you are booking with another operator, check their own fitness rules because the test may be different. For example, Bikat Adventures currently asks Kedarkantha trekkers to meet a wider fitness set. Its benchmark includes a 3 km jog in 25 to 30 minutes, a continuous 10 km walk on a slight incline, climbing 30 floors, and basic strength exercises. So there is no single Kedarkantha minimum fitness 5 km running test benchmark that applies to every company. That is an important detail many short fitness guides miss. What Does 5 km in 48 Minutes Actually Mean? A 48-minute 5 km is not a race target for most first-time trekkers. It means you cover 5 km at roughly 9:36 per kilometre. You should be able to keep that pace with controlled breathing and without taking long rests. If you are new to running, do not worry if you cannot do it today. Your first goal is to build the habit of walking and jogging. Speed can come later. Think of it like climbing a staircase. You do not jump from the first step to the tenth. You take one step, then another. For a trek, that steady effort is often more useful than a very fast burst of speed. Why Is the 48-Minute Test Useful? A 5 km test gives you a quick way to check your basic stamina. Kedarkantha may be called a beginner-friendly trek, but it still takes you to around 12,500 feet. The trail has uphill sections, snow in winter and a long summit day. You need enough fitness to keep walking when the excitement of the first day has worn off. If you are new to Himalayan trekking, understanding the demands of the Kedarkantha Trek for Beginners can also help you judge whether your current fitness level is realistic. Running also shows how your heart and lungs handle steady effort. But there is a catch. Running on a flat road is not the same as climbing a mountain. You may be able to run 5 km in 45 minutes near your home and still struggle on a steep snowy climb. That is why your training should include stairs, uphill walking, strength work and longer walks. Can You Do Kedarkantha If You Cannot Run 5 km in 48 Minutes? Yes, depending on your operator and your current fitness.If your operator has made 48 minutes a mandatory fitness criterion, then you need to meet that requirement before the trek. If the operator has a different benchmark, follow that instead. But even when there is no strict 48-minute rule, the test is still useful for your own preparation. Suppose you currently take 60 minutes to cover 5 km. That does not mean you should cancel your trek. It means you have a clear starting point. Start with brisk walking and short jogs. Build your time and distance slowly. You may be surprised by how much you improve in six weeks with steady training. A structured Kedarkantha Trek Preparation routine can help you build this base without trying to do everything at once. What If You Can Walk 5 km in 48 Minutes? This is better than doing nothing, but it is not the same as meeting a running or jogging requirement. If your operator specifically asks for a 5 km jog or run in 48 minutes, a brisk walk may not meet that rule. Check the exact wording before you upload your fitness record or travel to the base. For your own training, though, a 48-minute brisk walk is a useful start. Try a simple walk-jog pattern. Walk for three minutes, then jog for two minutes. Repeat this for about 30 minutes. As your fitness improves, make the jogging parts longer. There is no need to go from zero to five kilometres in one week. That is a good way to make your knees complain before your trek even begins. What Should You Train Besides the 5 km Test? This is where your preparation becomes much more useful. A good Kedarkantha routine should train your heart, legs and ability to stay active for a long time. Bikat’s current Kedarkantha benchmark is a good example of why a single running test does not tell the whole story. Its test also looks at incline walking, stairs and leg strength. Focus on these areas: Brisk walking: Build towards longer walks without frequent breaks. Jogging: Work towards your 5 km target at a steady pace. Stairs: Add regular stair sessions to build climbing strength. Squats and lunges: Train your thighs and hips for climbs and descents. Incline walking: Use a hill or treadmill incline if you have access to one. Long walks: Slowly build up to 8 to 10 km before the

Kedarkantha Trek Fitness Target: Can You Run 5 km in 48 Minutes? Read More »
What Happens When You Don't Get Fit Before Kedarkantha Trek?

What Happens When You Don’t Get Fit Before Kedarkantha Trek?

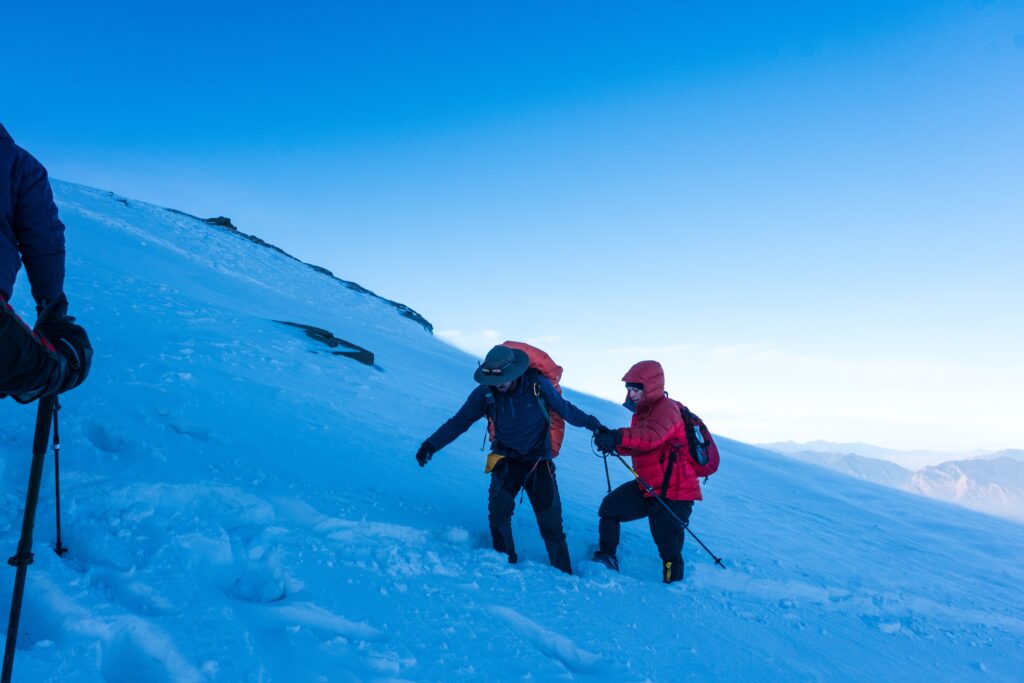
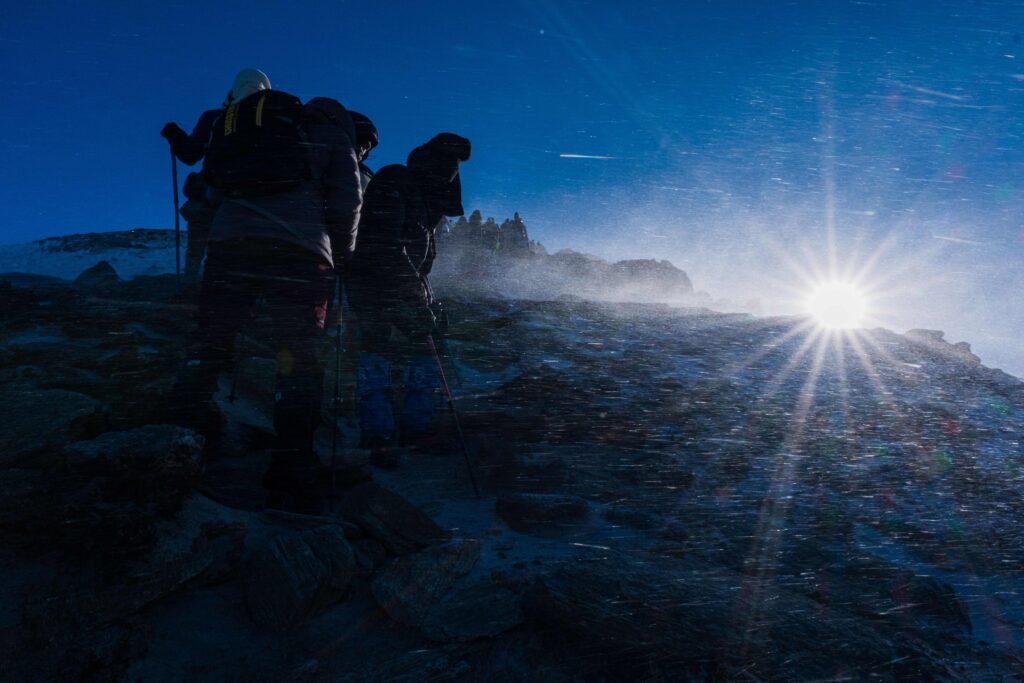
If you do not get fit before the Kedarkantha trek, the climb can feel much harder than expected, and you may struggle to keep up with your group. Kedarkantha is a good first Himalayan trek, but it still takes real effort. You climb from Sankri at about 6,400 feet to nearly 12,500 feet at the summit. You also walk on snow in winter, carry a backpack, and face a long summit day. The good news is that you do not need to be an athlete. You need enough stamina, leg strength, and balance to walk uphill for hours. If you skip that basic preparation, the problems usually show up on the trail itself. Where does poor fitness hurt most on Kedarkantha? Not every part of the Kedarkantha trek feels equally hard. This is important because an unfit trekker may feel fine on the first day and think, “I can manage this easily.” The early part of the trek is often more forgiving. The walk from Sankri towards Juda Ka Talab gives your body time to settle into the climb. You may still feel tired, but the effort is easier to manage when compared with the summit day. The Day 2 Kedarkantha trek from Sankri to Juda Ka Talab gives you a better idea of how the effort builds during the route. The real test comes as the trail gets higher and steeper. By the time you reach the base camp, your legs have already done several hours of uphill walking. Then comes the hardest part. The summit day is where fitness shows The summit day is usually the biggest test of your stamina. You start very early, often before sunrise, and walk in the cold and dark. The trail becomes steeper as you move towards the summit. You can get a clearer picture of this demanding section in the Kedarkantha summit climb. You may walk around 6 to 9 km that day, depending on the route and campsite plan. It can take roughly 7 to 8 hours or more for the full climb and return. Snow can slow you down even further. This is where a fit and an unfit trekker can have very different days. A prepared trekker may keep a steady pace with short breaks. An unfit trekker may stop every few minutes, breathe hard, and watch the group move farther ahead. And that can be frustrating. You have travelled all the way to Kedarkantha for the sunrise and mountain views. But if your body is running out of energy, you may spend the summit push thinking only about the next place to sit. What happens when you fall behind your group? The first problem is not always pain. It is often pace. Your trek team works around daylight, camps, food, weather, and safety. If one person becomes much slower, the trek leader has to keep checking that person. On a group trek, this can affect the timing of the whole team. A short break is normal. Many trekkers need them. The concern starts when you cannot recover after a break and your pace keeps dropping. You may notice things like: You need breaks much more often than the rest of the group. Your legs feel heavy even on a gentle climb. You struggle to walk at a steady pace. You feel weak while carrying your day pack. Your balance gets worse when your legs become tired. You need much longer to recover after each climb. This is why fitness matters even on a trek called beginner-friendly. You can also see how fitness fits into the wider picture in this guide to Kedarkantha trek difficulty. Beginner-friendly means the trek is suitable for people with little or no Himalayan trekking experience. It does not mean you can go from a mostly inactive routine to a snowy summit without preparation. Can an unfit trekker be sent back? Yes, a trek leader can ask you to stop or turn back if your condition makes it unsafe to continue. The exact rules vary between trekking operators. So do not assume that every company follows the same fitness test or cut-off. What matters on the trail is your actual condition. If you cannot maintain a safe pace, look badly exhausted, have trouble keeping your balance, or show signs of illness, the leader may decide that continuing is not worth the risk. This is one reason it is useful to understand the role of  Trek leaders on Kedarkantha before you start. This can be hard to accept. You may think, “I have paid for the trek. I must finish it.” But money cannot change your physical condition on a mountain. A good trek leader will put safety before the goal of reaching the summit. Being asked to turn back is not a failure. It is far better than pushing on when your body is no longer coping well. What injuries can happen when you are too tired? Fatigue changes the way you walk. When your thighs and calves become weak, you may stop lifting your feet properly. Your steps can become less steady. This matters on snow, ice, rocks, and uneven ground. A small wrong step can lead to a twisted ankle. Tired legs can also place more strain on your knees, especially during the descent. The return from the summit is easy to underestimate. You may think, “The hard part is over.” But tired legs still have to handle several hours of downhill walking. That is why being fit is not only about reaching the top. You also need enough strength to come back safely. There is another issue in winter. Moving very slowly means you spend more time outside in cold conditions. Your hands and feet need proper protection, and you should not ignore numbness, unusual weakness, or other warning signs. Does poor fitness cause altitude sickness? Not directly. Altitude sickness is linked to the body’s response to reduced oxygen at high altitude. Being fit does not make you immune to

What Happens When You Don’t Get Fit Before Kedarkantha Trek? Read More »

Kedarkantha Trek Fitness Approval

Kedarkantha Trek Fitness Approval: Strava, Screenshots & Dashboard Upload

If you are doing the Kedarkantha trek with Indiahikes, you need to show recent fitness proof, usually through three run or jog records, and upload the required screenshots to your own Indiahikes dashboard. Strava is one of the apps you can use to record these runs. Indiahikes also accepts fitness records tracked through apps such as Nike. The process is simple once you know what to do. Record your runs, save clear screenshots, and upload them from the dashboard linked to your own registered email. The main thing is to meet the fitness level set for your trek and submit the proof in the format asked by Indiahikes. If you are still unsure whether you are physically ready, it also helps to understand the basic Kedarkantha trek preparation before you start uploading records. Kedarkantha trek fitness approval Strava: What do you need? For the current Indiahikes process, each trekker must submit their own fitness proof. If you are travelling with friends or family, one person cannot upload records for the whole group. Each trekker needs to log in to their own dashboard and submit their own records. You need a minimum of three run or jog proofs. Indiahikes says you can use Strava, Nike or a similar fitness app to track your activity. Your records should also show that you are meeting the fitness level required for your trek. So, if your main question is, “What should I do now?”, follow this order: Install Strava or use another accepted fitness app. Record your runs or jogs. Keep at least three clear fitness records. Take screenshots that show the key activity details. Log in to your Indiahikes dashboard. Upload the screenshots under your own account. Check that the records meet your trek’s fitness criteria. That is the basic Kedarkantha trek fitness approval Strava process. You do not need a fancy watch or expensive fitness gear just to create the proof. What should a Strava fitness screenshot show? A good screenshot should make your workout easy to check. The reviewer should be able to see the main details without opening another app or guessing what the numbers mean. Your screenshot should ideally keep details such as the activity, date, distance and time visible. If your fitness target uses pace or another measure, keep that visible too. Do not crop the image so tightly that the date or activity details disappear. A clean screenshot is better than a pretty screenshot. For example, a useful screenshot may show: Activity: Run or Jog Date: Clearly visible Distance: Clearly visible Time: Clearly visible Pace: Visible when relevant Your account: Clear enough to link the activity to you Important: These images are only visual examples of a Strava activity screen. Do not copy another person’s record. Upload your own genuine activity proof. How to upload Strava screenshots to the Indiahikes dashboard Once you have your required records, the next step is the dashboard upload. This is where many first-time trekkers become unsure because they expect a separate Strava approval page. There is no need to overthink it. Strava records your fitness. Your Indiahikes dashboard is where you submit the proof requested by the trek operator. Open your Indiahikes account and go to the fitness section shown for your trek. Upload the required screenshots there. Make sure you are using the dashboard connected to the same registered email used for your trek booking. Indiahikes specifically says each trekker must submit their own screenshots through their own dashboard. Before you click submit, check the images once. This takes less than a minute and can prevent a lot of back and forth. Your final check should include: Three required fitness proofs are ready. Each record belongs to you. Dates and activity details are visible. Your runs meet the fitness target for your trek. You are uploading from your own dashboard. The images are clear and readable. Some current Indiahikes trek pages state that the screenshots should be uploaded 15 to 20 days before the trek date. Since deadlines and instructions can vary by trek, always give priority to the date shown in your own Indiahikes dashboard or trek instructions. How many Strava screenshots are needed for Kedarkantha? The current Indiahikes fitness approval page says a minimum of three run or jog proofs must be submitted. This does not mean you should run three times on three random days and stop. The point is to show that you are actually preparing. Several current Indiahikes trek pages also say that the runs should meet the trek’s fitness criteria at least three times in the past month. That makes sense from a trek point of view. One fast run can happen on a good day. Three suitable runs over time give a better picture of your fitness. If you are not yet close to the required level, do not panic. Start with a steady plan and work towards it. Your overall fitness matters much more than one good screenshot. Can you use Nike instead of Strava? Yes. Strava is not the only option. India­hikes says trekkers can use fitness apps such as Strava or Nike to track their runs. Its current fitness approval page also mentions smartwatches and mobile apps. So, if you already use a smartwatch that records your runs, you may not need to change your whole routine. The important part is that the fitness record is clear and follows the instructions given for your trek. If your dashboard asks for a specific type of proof, follow that instruction rather than assuming that every Indiahikes trek uses the same upload method. What if your fitness screenshots are rejected? A rejection does not mean you have failed the trek forever. It means your submitted proof does not meet the required conditions. India­hikes lists two main reasons for rejection: not uploading the required three screenshots, or not meeting the trek’s fitness criteria in the required number of runs. Read the reason first. If you missed a screenshot, fix the missing upload. If

Kedarkantha Trek Fitness Approval: Strava, Screenshots & Dashboard Upload Read More »

6-Week Training Plan for Kedarkantha Trek

6-Week Training Plan for Kedarkantha Trek

A good 6 week training plan for Kedarkantha trek should build your stamina, leg strength, and uphill fitness without leaving you tired or sore before the trek. You do not need to be a gym rat or a fast runner. But you should be able to walk for a long time, climb stairs, carry a light pack, and recover well after a hard day. Kedarkantha is a beginner-friendly winter trek, but the word “beginner” can be misleading. The summit is around 3,800 metres or 12,500 feet high. The full route is around 20 to 23 km, depending on the route and operator. Regular trek days can cover about 4 to 5 km, while summit day can stretch to around 9 km and take 7 to 8 hours. That last day is where your training really matters. You start early, walk in cold weather, climb on snow, and gain height for hours. So, the goal of these six weeks is simple: make that long day feel manageable. What Fitness Level Do You Need for Kedarkantha? You do not need to run a marathon before Kedarkantha. A useful fitness test is being able to jog or run 5 km in about 38 to 40 minutes. Indiahikes uses around 5 km in 38 minutes as a good target. Its broader fitness guide gives 40 to 45 minutes as a more suitable target for people above 40. Bikat Adventures uses another useful test. It suggests being able to run 3 km in 25 to 30 minutes, walk 10 km on a slight incline, climb 30 floors without a break, and do basic squats, lunges, and push-ups. Do not treat these numbers as an exam. They are simple checks to see where you stand. If you cannot meet them today, that does not mean you should cancel your trek. It means you have a clear starting point for your training. You can also compare your starting point with the wider Kedarkantha trek difficulty before you begin. Your 6 Week Training Plan for Kedarkantha Trek The plan below works well for a person who can already walk for about 30 minutes. If you are not active at all, start more slowly. You can repeat a week before moving ahead if your body needs more time. Week Cardio Strength Stairs / Incline Main Goal Week 1 3 × 30–40 min 2 sessions 10–15 min Build routine Week 2 3 × 40–50 min 2 sessions 15–20 min Improve stamina Week 3 2 × 45–50 min + 1 × 60 min 2 sessions 20–30 min Add uphill work Week 4 2 × 50 min + 1 × 75–90 min 2 sessions 30–40 min Start trek practice Week 5 2 moderate sessions + 1 × 90–120 min 2 sessions 30–45 min Peak training Week 6 2 × 30–45 min 1 light session Short easy session Recover and taper Week 1: Start With Basic Stamina The first week should feel controlled. You are building a habit, not trying to prove your fitness in seven days. Walk briskly for 30 to 40 minutes on three days. You should breathe faster but still be able to speak in short sentences. Add two short strength sessions during the week. Use basic exercises such as squats, reverse lunges, calf raises, glute bridges, and planks. Start with a small number of repetitions. Good form matters more than doing 50 squats badly. Take at least one full rest day. Your muscles need time to repair and grow stronger. Week 2: Increase Your Walking Time Your body should now be used to regular exercise. Increase your brisk walks to 40 to 50 minutes. Add a short stair session once a week. If you live in a flat city, do not worry. Apartment stairs, stadium steps, or a treadmill with an incline can all help. Keep two strength sessions. Focus on your thighs, hips, calves, and core because these areas work hard during climbs and descents. By the end of this week, a 45-minute brisk walk should feel much easier than it did at the start. Week 3: Add Hills and Stairs This is when the plan starts looking more like trek training. Kedarkantha is not a flat road walk, so your heart and legs need to work against an incline. Do two brisk walks of 45 to 50 minutes. Add one longer walk of about 60 minutes. Include stairs or an incline during another session. Try step-ups during your strength workouts. They are simple but useful because the movement is close to stepping uphill. Do not race up the stairs. A steady pace is better. You are training your body to keep working, not trying to win a race with your neighbour. Week 4: Start Trek-Specific Training By week four, add a light backpack to one longer walk. Start with only a small load. You are learning how the pack sits on your shoulders and back. Aim for one 75 to 90-minute walk. Use your trekking shoes for part of the session. This is also a good time to test your socks and walking clothes. Add stairs or an incline for 30 to 40 minutes during the week. Keep two strength sessions as well. Your weekend walk should now feel like a small trek. Walk for a long period, take short breaks, drink water, and have a snack when needed. These small habits become useful on the real trail. Week 5: Do Your Hardest Training Week five is your peak week. Your body should now handle longer sessions without falling apart the next day. Do one long walk or hike for 90 minutes to two hours. Add an incline or stairs where possible. Carry the light pack you expect to use on the trek. This is also the right week to check your fitness against simple targets. You can aim for a 5 km jog or run in around 38 to 40 minutes. If running is not suitable for you, work towards a brisk 10 km walk

6-Week Training Plan for Kedarkantha Trek Read More »

Kedarkantha vs Dayara Bugyal

Kedarkantha vs Dayara Bugyal: Which Is Better for a Winter Trek?

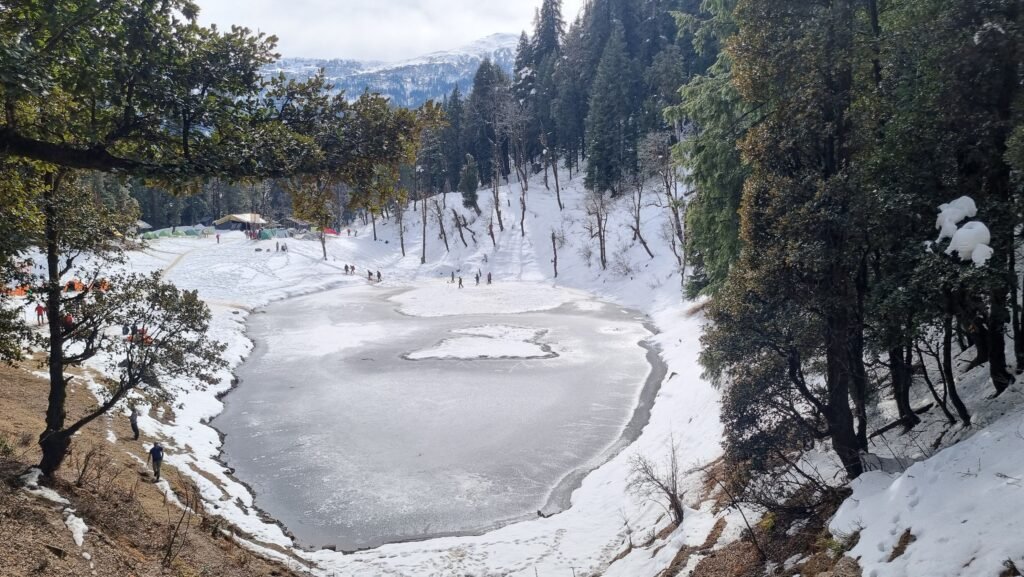
Kedarkantha is better if you want a true snow trek with a summit climb. Dayara Bugyal is better if you want easy walks, open views, and peaceful mountain time. Both are beautiful winter treks in Uttarakhand, but they offer very different experiences. Many first-time trekkers get confused between these two treks. Both have snow, mountain views, and beginner-friendly routes. But the feeling you get on the trail is not the same. Think about what you want from your trip. Do you want to stand on a summit after a tough climb? Or do you want to walk slowly through huge mountain meadows? Your answer will help you choose the right trek. If you are planning your first Himalayan adventure, comparing Kedarkantha Trek with Dayara Bugyal can help you understand which trail matches your expectations better. Both are among the most loved best winter treks in India, but the experience is not the same. Kedarkantha vs Dayara Bugyal Trek: Quick Comparison Before booking any trek, it is important to know the basic difference. A good trek is not only about views. The starting village, travel time, snow chances, and difficulty also matter. Feature Kedarkantha Trek Dayara Bugyal Trek Base village Sankri Raithal Altitude Around 12,500 ft Around 12,000 ft Trek distance Around 20 km Around 20 to 25 km Duration 4 to 6 days 4 to 6 days Difficulty Easy to moderate Easy to moderate Main highlight Snow trek and summit climb Wide meadows and mountain views Snow chances More reliable in winter Depends on snowfall Best for Adventure lovers and beginners Families and nature lovers If you are searching for kedarkantha vs dayara bugyal trek, remember this simple difference: Kedarkantha is about reaching the top. Dayara Bugyal is about enjoying the journey. The Kedarkantha trek total distance is around 20 km, which makes it a short but rewarding Himalayan trek. Dayara Bugyal covers a similar distance, but the walking style and trail feel are different. Kedarkantha Trek: Best for Snow and Summit Experience Kedarkantha is one of the most popular winter treks in India. The trek starts from Sankri village in Uttarkashi district. Sankri is also a base village for many famous Himalayan treks. The trail takes you through pine forests, snowy paths, and beautiful campsites. The famous Juda Ka Talab campsite is one of the biggest highlights of the route. During winter, the frozen lake surrounded by trees looks like a scene from a mountain movie. The biggest attraction is reaching the summit. The final climb takes you above the tree line and opens views of snow-covered Himalayan peaks. The Kedarkantha summit climb is the part that creates the biggest excitement among first-time trekkers. Most trekkers start early in the morning for the final climb. When the first sunlight touches the mountain peaks, the cold and tired steps suddenly feel worth it. That one moment is why many people choose Kedarkantha as their first winter trek. Choose Kedarkantha if you want: A proper snow trekking experience A Himalayan summit climb Beautiful forest trails Winter camping A feeling of achievement after reaching the top The summit day needs more effort. The climb becomes steep in some sections, and cold winds can make the walk harder. Before starting the trek, it is helpful to follow a proper fitness plan for Kedarkantha trek because good stamina makes the climb easier. Dayara Bugyal Trek: Best for Meadows and Peaceful Views Dayara Bugyal offers a different type of mountain experience. The trek starts from Raithal village, which gives you a chance to see local Himalayan life before the trek begins. The word “bugyal” means a high-altitude meadow. These large grasslands are the main attraction of this trek. After snowfall, the meadows can turn white and create a beautiful winter landscape. Unlike Kedarkantha, Dayara Bugyal does not focus on reaching one summit point. The beauty comes from the open landscapes, peaceful trails, and mountain views. On clear days, you can see famous peaks like Draupadi Ka Danda, Bandarpoonch, Black Peak, and parts of the Gangotri range. Choose Dayara Bugyal if you want: A relaxed mountain walk Wide open views A family-friendly trek Great photography spots A quieter Himalayan experience Many trekkers love Dayara Bugyal because it allows them to slow down. You can sit, enjoy the views, and feel connected with nature. Kedarkantha vs Dayara Bugyal Trek Difficulty: Which Is Easier? Both treks are good for beginners. But Dayara Bugyal is usually easier than Kedarkantha. Dayara Bugyal has smoother climbs and a more relaxed route. This makes it a good option for families, older beginners, or people doing their first trek. Kedarkantha feels slightly harder because of the summit climb. The last section needs more energy and patience. The Kedarkantha trek difficulty mainly comes from the summit day, winter weather, and altitude gain. It is not a technical climb, but proper preparation always helps. For people asking dayara bugyal or kedarkantha which beginner winter trek is better, the answer depends on your goal. Choose Dayara Bugyal if: You want an easier first trek You prefer slow travel You are travelling with family Choose Kedarkantha if: You want adventure You want to climb a summit You want a classic snow trek Which Trek Has Better Snow? This is one of the biggest differences between the two treks. Kedarkantha is known as one of the most reliable winter snow treks in Uttarakhand. During peak winter, the route usually has snow-covered forests, frozen campsites, and a proper winter feel. Dayara Bugyal can also become very beautiful after snowfall. However, snow depends more on weather conditions. The trek is famous mainly for its large meadows and mountain views rather than only snow. If your main dream is walking on snow, Kedarkantha is the safer choice. If your dream is standing in a huge mountain meadow with beautiful views, Dayara Bugyal can be amazing. Base Village Difference: Sankri vs Raithal The journey before the trek also changes your experience. Many people only compare the trail, but the base village

Kedarkantha vs Dayara Bugyal: Which Is Better for a Winter Trek? Read More »

Kotgaon Village The Hidden Gem That Starts the Kedarkantha Journey

Snow Trek on Kedarkantha: What First Timers Must Know Before Stepping on Ice

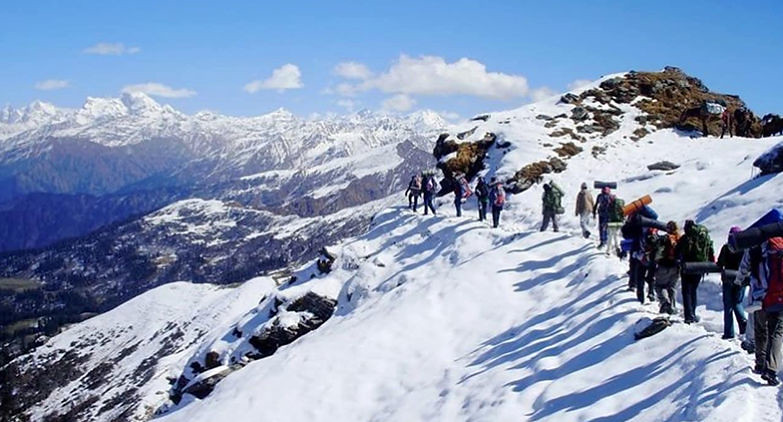
If this is your first snow trek, Kedarkantha is one of the best places to start. The trail is easy to moderate, the climb is gradual, and you get enough time to learn how to walk safely on snow without any technical climbing experience. Most first-time trekkers worry about one thing before they leave home. “What if I slip on the ice?” It is a fair question. Snow looks beautiful in photos, but it can also feel scary if you have never walked on it before. The good news is that the trail is not one long sheet of ice. Most of the route is packed snow, and with the right shoes, a steady pace, and guidance from your trek leader, even beginners usually gain confidence within the first day. This snow trek on Kedarkantha first timers guide focuses on what really happens on the trail. You will learn what snow feels like under your feet, where the trek becomes steeper, how cold it gets, what fitness you actually need, and the simple habits that make your first winter trek safe and enjoyable. Kedarkantha is also considered one of the best first summit treks in India because it offers a gradual climb with a proper summit experience. Why Kedarkantha Is One of the Best Snow Treks for Beginners Not every Himalayan winter trek suits beginners. Some trails have long steep climbs, while others need technical skills or special equipment. Kedarkantha is different. The trek covers about 20 kilometres over four to five days. You begin from Sankri at around 1,950 metres (6,400 feet) and climb gradually through pine forests, snowy clearings, and campsites before reaching the Kedarkantha Summit at about 3,810 metres (12,500 feet). Knowing the route details before your journey makes the experience much easier. The Kedarkantha trek total distance helps beginners understand how much they need to walk each day and how to prepare their body for the trail. The trek gives your body enough time to adjust to the altitude. Each day feels a little harder than the last, but the increase is gradual instead of sudden. That is one reason so many people choose Kedarkantha as their first Himalayan snow trek. Another reason is the support available on the trail. During the winter season, experienced trek leaders walk with every group. They explain where to place your feet, how to use trekking poles, and how to cross icy patches safely. What Walking on Snow Really Feels Like The biggest surprise for most beginners is that walking on snow feels easier than they expected. Fresh snow feels soft under your boots. Packed snow is firmer and easier to walk on. Only a few shaded sections become slippery because the snow freezes into ice. The first thirty minutes usually feel strange. Your shoes sink a little, your legs work harder, and every step feels slower than it does on a normal trail. After some time, your body gets used to the new surface. You stop thinking about every step and begin enjoying the walk. Many people compare it to walking on a wet marble floor. You naturally slow down, stay balanced, and avoid sudden movements. That same habit works well on snowy trails. Where the Trek Feels Hardest The Kedarkantha trek is not difficult for most healthy beginners, but there is one section that deserves extra respect. The final climb to the summit gains about 400 metres of altitude in nearly 2 kilometres. Some parts of this stretch have a 30 to 35-degree slope, making it the steepest section of the trek. By this point, you are already above 3,600 metres, where the air feels thinner than it did at the base camp. That means you naturally walk slower and take more short breaks. The Kedarkantha summit climb is often the most memorable part of the trek because it tests your patience before rewarding you with wide Himalayan views. Do not let these numbers worry you. Trek leaders expect everyone to move at their own pace. Nobody wins a prize for reaching the summit first. Small, steady steps almost always work better than trying to rush uphill. Will You Walk on Ice the Entire Time? No. This is one of the biggest myths about the Kedarkantha winter trek. Most of the trail is covered with packed snow instead of solid ice. Ice usually forms on exposed rocks or shaded parts of the trail where sunlight does not reach. During January and February, these icy patches become more common, especially above 3,500 metres. Your trek leader normally points them out before you reach them. If the trail becomes very icy, some trek operators also provide microspikes, which improve grip on frozen sections. For most of the trek, good trekking shoes and careful walking are all you need. How to Walk Safely on Snow Walking on snow is more about balance than strength. People often slip because they become nervous and start taking quick steps. Slowing down is actually the safest thing you can do. Keep these simple habits in mind throughout the trek. Place your whole foot on the snow instead of walking on your toes. Keep your knees slightly bent. Leave a little space between yourself and the person ahead. Look a few steps in front of you instead of staring only at your shoes. Use trekking poles for balance, especially while coming downhill. Follow the footprints already made by your trek leader whenever possible. What Temperatures Should You Expect? Cold weather feels different in the mountains because it changes throughout the day. During the trekking season, daytime temperatures usually stay between 5°C and 12°C when the sun is out. Nights are much colder and often drop to -5°C or even -10°C during peak winter. The funny part is that you may not feel very cold while climbing uphill. Your body produces heat as you walk. Most people actually feel colder when they stop for lunch or reach the campsite in the evening. That is why wearing

Snow Trek on Kedarkantha: What First Timers Must Know Before Stepping on Ice Read More »

kedarkantha trek

Return Journey from Kedarkantha: Trains, Buses & Flights After Trek

If you are planning your Kedarkantha trek return journey to Dehradun, the easiest option is to leave Sankri early in the morning, reach Dehradun by late afternoon, and then continue by train, bus, or flight. A little planning before the trek begins can save you from missing a connection or spending extra money on last-minute travel. Most people spend weeks planning how to reach Kedarkantha but give very little thought to the journey back. That is a mistake. The return trip is long, and mountain roads do not always run on schedule. Snowfall, road work, or traffic can easily add an extra hour or two to your drive. The good news is that getting back from Kedarkantha is simple once you know your transport options.  Why Your Return Journey Deserves Equal Planning Reaching the summit feels like the finish line, but your trip is only complete once you reach home safely. Many trekkers book flights or trains with very little buffer time because they assume the drive from Sankri will always take the same number of hours. Mountain roads rarely work like city roads. A small landslide, road repair, or fresh snowfall can slow traffic without warning. That is why Kedarkantha return travel planning on the last day is just as important as choosing the right trekking shoes. Keeping a buffer day after the Kedarkantha trek is one of the smartest decisions, especially during winter. If you are travelling during December or January, when the trek sees the highest number of visitors, expect a little more traffic on the way back. If you are visiting during peak snow season,  Kedarkantha Trek Return Journey to Dehradun The drive from Sankri to Dehradun is about 200 km. Depending on the exact route and road conditions, it usually falls between 197 and 205 km. In normal weather, the journey takes 8 to 10 hours. Most trek operators follow a similar schedule after the trek ends. A typical return day looks like this: Wake up around 5:00 am. Leave Sankri between 5:30 am and 7:00 am. Stop for breakfast on the way. Reach Dehradun between 3:00 pm and 5:00 pm. Continue your onward journey or stay overnight. These timings work well during clear weather. Heavy snowfall in winter or rain during the monsoon can increase travel time. If you have an important train or flight, avoid assuming that you will always reach Dehradun by afternoon. Giving yourself extra time is always the safer choice. Sankri to Dehradun Route Breakdown The return journey follows the same mountain road that brings you to the trek. The usual route is: Sankri Netwar Mori Purola Naugaon Mussoorie Bypass Dehradun The road passes through forests, rivers, and small Himalayan towns. It is a beautiful drive, but it also explains why the journey takes most of the day. If you remember stopping at Mori, the midway stop on the drive from Dehradun to Sankri while travelling to the trek, you will pass through the same town on your return. During winter, snowfall may slow traffic around Mori and Purola. In the rainy season, road repairs or small landslides near Naugaon can also cause delays. These are normal mountain conditions, so it is always better to keep a comfortable buffer before your next journey. Should You Stay One Night in Dehradun? For many trekkers, the answer is yes. After walking for several days and then sitting in a vehicle for eight or more hours, most people feel tired by the time they reach Dehradun. Rushing to catch another train or flight often makes the last day more stressful than it needs to be. Spending one night in Dehradun gives you time to rest and freshen up before travelling home. Choosing one of the hotels in Dehradun for Kedarkantha trekkers can make your onward journey much more comfortable. It also allows you to: Take a proper shower. Wash or dry trekking clothes. Enjoy a good meal. Buy souvenirs if you missed them earlier. Catch a morning train or flight without worrying about road delays. One extra night may add a small cost to your trip, but it often makes the end of the journey much more comfortable. Best Train Options After the Kedarkantha Trek Return Journey to Dehradun Dehradun Railway Station has good rail connections with many major cities across India. If you are travelling towards Delhi, you have several reliable options. It is also the closest railway station to Kedarkantha Trek, making it the main departure point for most trekkers. Some of the most popular trains include: Dehradun Shatabdi Express – A fast daytime train to New Delhi. Nanda Devi AC Superfast Express – A comfortable overnight train to Delhi. Mussoorie Express – A budget-friendly overnight option connecting Dehradun and Delhi. Upasana Express – Suitable for travellers going towards Uttar Pradesh, Bihar, and Kolkata. Train schedules can change during the year, so always check the latest timings on the IRCTC website or app before booking your tickets. If you are travelling to Delhi, comparing the best trains from Delhi to Dehradun for Kedarkantha Trek can also help when planning your return journey. If possible, avoid booking a train that leaves before 6:00 pm on the same day you travel from Sankri. Even if the roads are clear, you will have very little room for unexpected delays. An overnight train or a departure the following morning is usually the safer option. Flights After the Kedarkantha Trek If you are flying home, your journey starts from Jolly Grant Airport, which is about 25 km from the centre of Dehradun. Remember that reaching the airport also takes time. Depending on traffic, the drive from the railway station or city centre usually takes 45 minutes to one hour. If this is your first visit, the Jolly Grant Airport to Kedarkantha travel guide explains the airport route in detail. Many trekkers ask if they can book a flight on the same day they leave Sankri. The answer is yes, but only if the flight is

Return Journey from Kedarkantha: Trains, Buses & Flights After Trek Read More »

Kedarkantha Stargazing Guide

Kedarkantha Stargazing Guide: Night Sky, Milky Way & Astrophotography Spots

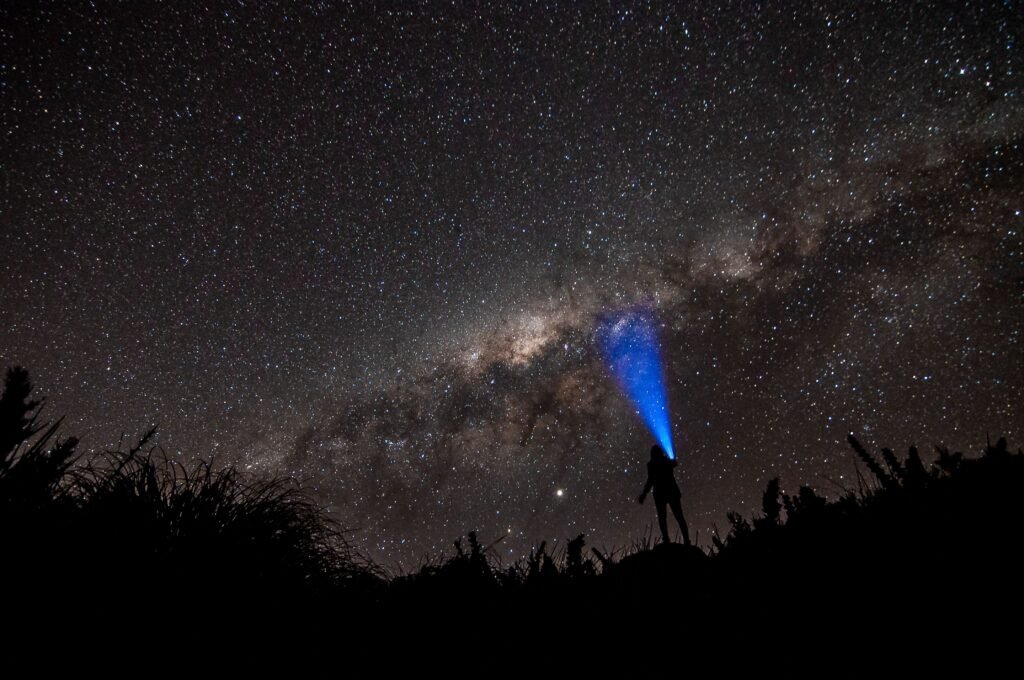
Kedarkantha offers one of the best night skies in the Indian Himalayas. If you want to watch thousands of stars, enjoy peaceful nights, or try your first astrophotography session, this trek is a great choice. Most people visit Kedarkantha for its snowy trails and the famous Kedarkantha summit climb. But after sunset, the mountains show a different kind of beauty. Camp lights grow dim, the forests become quiet, and the sky slowly fills with stars. If you have only seen city skies before, this moment can stay with you long after the trek ends. This Kedarkantha stargazing guide night sky explains when to go, where to watch the stars, how to photograph them, and what you can realistically expect. Whether you carry a professional camera or only your phone, you can enjoy an unforgettable night under the Himalayan sky. Why Kedarkantha Is One of the Best Places for Stargazing Not every mountain trek offers a dark sky. Many popular hill stations and tourist spots have hotels, roads, and bright lights that hide the stars. Kedarkantha is different. Once you leave Sankri Village behind, artificial lights almost disappear. The campsites sit high in the mountains, surrounded by forests and open meadows. On clear nights, the clean mountain air and low light pollution make the sky look much brighter than it does in most cities. One reason Kedarkantha is called the Queen of Winter Treks is that its winter weather often brings crisp, cloud-free nights that are perfect for watching the stars. You do not need a telescope to enjoy the view. Even with your eyes alone, you can spot thousands of stars that are impossible to see from places like Delhi, Mumbai, or Bengaluru. Kedarkantha Stargazing Guide Night Sky: What Can You See? Most first-time trekkers expect to see more stars than usual. The reality is often much better. Give your eyes about 20 minutes to adjust to the darkness. Avoid looking at your phone during this time. As your eyes adapt, more stars slowly appear across the sky. On a clear night, you may see: The Milky Way stretching across the sky during the right season. Orion, one of the brightest winter constellations. Cassiopeia and Ursa Major. Bright planets like Jupiter or Venus. Satellites moving slowly across the sky. Shooting stars during major meteor showers. Many trek leaders also ask everyone to switch off their torches for a few minutes after dinner. Once the campsite becomes completely dark, the sky often looks far brighter than most people expect. This peaceful atmosphere is also one reason many trekkers enjoy the digital detox on the Kedarkantha trek. Best Time for Kedarkantha Base Camp Stargazing and Milky Way Photography The best time depends on what you want to see. If your goal is general stargazing, winter is the best season, especially during the Kedarkantha trek in December when the skies are usually dry and clear. This gives you excellent views of bright stars, winter constellations, and planets. If your goal is the bright Milky Way core, the timing is slightly different. The core is not well placed in the night sky during December and January. It starts becoming visible before dawn from around March and becomes easier to photograph during late March and April. Since Kedarkantha remains open until spring, these departures offer the best chance for Milky Way core photography.  The moon also plays an important role. A full moon brightens the sky and hides many faint stars. If possible, plan your trek close to a new moon. A darker sky always gives better stargazing and better photographs. Quick Guide to the Best Time Goal Best Time General stargazing December to February Orion photography December to January Geminid meteor shower Around 13 to 14 December Quadrantid meteor shower Early January Milky Way core photography Late March to April before sunrise Before confirming your trek, check both the weather forecast and the moon phase. Even the best season cannot help if thick clouds cover the sky. If you are choosing dates mainly for snow and clear weather, check the best time to visit the Kedarkantha trek. Best Kedarkantha Base Camp Stargazing and Astrophotography Spots You do not have to search for secret locations. The main camps on the trek already offer fantastic views of the night sky. 1. Kedarkantha Base Camp This is the most popular place for Kedarkantha base camp stargazing, Milky Way astrophotography, and wide-angle night photography. The open layout of Kedarkantha Base Camp gives photographers clear views of the sky in almost every direction. The campsite sits in an open area with very little light pollution. Snow-covered ground, pine trees, and mountain ridges create beautiful foregrounds for photographs. Walking a short distance away from the tents also helps reduce light from camp lanterns. 2. Juda Ka Talab Juda Ka Talab offers a different feel. Tall pine trees surround the campsite and add depth to your photographs. On calm nights, the frozen or still lake can create beautiful reflections. The trees also reduce the wind, making it easier to spend more time outside with your camera. 3. Near the Summit Ridge Trekkers following the Kedarkantha Summit Day route often see stars shining above the mountains before sunrise. This is a wonderful place for dramatic landscape photography. Be careful while stopping for photos. The trail can be icy before dawn, so always stay with your group and watch your footing. Simple Astrophotography Tips for Beginners You do not need expensive equipment to capture the night sky. Good planning often matters more than costly gear. If you carry a DSLR or mirrorless camera, start with simple settings and adjust them slowly as you learn. A few useful tips include: Use a sturdy tripod. Shoot in manual mode. Keep the aperture as wide as possible. Start with ISO 1600 to 3200. Use a shutter speed of about 15 to 20 seconds for most wide-angle lenses. Focus manually on a bright star before taking photos. One helpful trick is the 500 Rule. Divide 500

Kedarkantha Stargazing Guide: Night Sky, Milky Way & Astrophotography Spots Read More »

kedarkantha trek in february

Kedarkantha Trek Height: Summit, Base Camp & Every Campsite Altitude

If you’re looking for the Kedarkantha trek height, the highest point of the trek is 12,500 ft (3,810 metres) at the Kedarkantha Summit. The trek starts from Sankri Village at around 6,400 to 6,500 ft, depending on the GPS source, and climbs gradually through well-spaced campsites. This slow gain in altitude is one of the biggest reasons Kedarkantha is considered one of India’s best beginner-friendly Himalayan treks. One thing often confuses trekkers before they even pack their bags. Open three different websites, and you may find three different altitude figures for the same campsite. Does that mean someone is wrong? Not really. Trek operators, GPS devices, trekking apps and maps often record slightly different elevations. These differences usually range between 100 and 300 feet. The summit height of 12,500 ft stays almost the same across reliable sources, while campsite elevations may vary a little depending on where the measurement is taken. Kedarkantha Trek Height at Every Stage The table below shows the commonly accepted altitude of each campsite. Small variations are normal, but these figures are widely used by experienced trekking operators. Trek Stage Approx. Distance Altitude Sankri Village (Base) Drive from Dehradun 6,400 to 6,500 ft Juda Ka Talab 4 km 9,000 to 9,100 ft Kedarkantha Base Camp 4 km 11,200 to 11,300 ft Kedarkantha Summit 3 km 12,500 ft This gradual climb is one of the reasons beginners usually enjoy the trek. Your body gets enough time to adapt instead of climbing thousands of feet in a single day. Why Kedarkantha Trek Height Matters Many people only look at the summit height. That tells only half the story. Altitude affects the amount of oxygen your body receives. As you climb higher, the air becomes thinner, so your body works harder even while walking at the same speed. A trail that feels easy at sea level may feel tiring at 11,000 feet because every breath carries less oxygen. This is why experienced trekkers pay more attention to campsite altitudes than the summit itself. Your body spends the night at those camps, slowly adjusting before the next day’s climb. A gradual climb is always safer than a fast one. Kedarkantha follows this rule well, making it suitable for first-time Himalayan trekkers. In fact, its steady ascent is one of the main reasons it is often called the most beginner-friendly summit trek in the Indian Himalayas. Kedarkantha Trek Height Starts at Sankri Village Every Kedarkantha trek begins from Sankri Village, a small mountain village in Uttarkashi district. Sitting at around 6,400 to 6,500 ft, Sankri is already much higher than most Indian cities. If you are travelling from Delhi, Mumbai or Bengaluru, you may notice the cool mountain air as soon as you step out of the vehicle. Some trekkers feel slightly tired after the long drive, but this usually comes from the journey rather than the altitude itself. Instead of staying inside your room, take a short walk through the village during the evening. The wooden houses, small cafés and apple orchards make for a relaxing first day. A gentle walk also helps your body adjust before the trekking begins. Most trekking companies complete permit formalities here, hand over rented gear and conduct a short briefing about the trail. Do You Need a Permit? Yes. Since the trek passes through Govind Pashu Vihar National Park and Wildlife Sanctuary, every trekker needs an entry permit. Most organised trekking companies include this permit in their package, so you rarely have to arrange it yourself. Independent trekkers can obtain the required permission at Sankri after showing a valid photo ID and paying the forest entry fee. It is always a good idea to carry both digital and printed copies of your identity proof during the trek. Kedarkantha Trek Height at Juda Ka Talab The first trekking day covers about 4 kilometres and ends at Juda Ka Talab, which sits at roughly 9,000 to 9,100 ft. The trail climbs steadily through dense forests filled with pine, oak and maple trees. During winter, these forests often turn into beautiful snow-covered tunnels that many trekkers remember long after the trek ends. This campsite marks your first major gain in altitude. You have climbed nearly 2,600 to 2,700 feet from Sankri without putting too much strain on your body. Many beginners expect the first day to be exhausting. In reality, the gradual slope makes it surprisingly comfortable if you walk at your own pace. The lake itself freezes during peak winter, creating one of the most beautiful campsites on the trek. Early mornings often begin with a thin layer of snow sparkling under the first rays of sunlight. How Cold Does It Get? Height and temperature go hand in hand. As you climb higher, the weather becomes noticeably colder. Here is what you can usually expect during the winter trekking season. Location Day Temperature Night Temperature Sankri 8°C to 15°C 0°C to 5°C Juda Ka Talab 2°C to 8°C -5°C to -2°C Base Camp -2°C to 5°C -8°C to -5°C Summit (Early Morning) -8°C to -3°C Depends on weather These temperatures can change depending on snowfall, cloud cover and the month of your trek. January usually feels much colder than early December or late March. Good layering keeps you warm far better than wearing one very thick jacket. Kedarkantha Trek Height at Base Camp The second trekking day covers another 4 kilometres and takes you to Kedarkantha Base Camp, located at around 11,200 to 11,300 ft. This is where you truly begin to feel that you are trekking in the high Himalayas. The forests slowly disappear, and the landscape opens into wide snowfields and mountain ridges. On a clear evening, you can watch the sun set behind layers of Himalayan peaks while the sky fills with countless stars. You also spend your highest night here before attempting the summit. Most healthy trekkers adjust well because they have already spent one night at Juda Ka Talab. Still, some people notice mild effects of the thinner air. Common

Kedarkantha Trek Height: Summit, Base Camp & Every Campsite Altitude Read More »

kedarkantha trek in february

Kedarkantha Trek Permit & Forest Fee 2026

Every trekker needs a Kedarkantha trek permit before starting the trek in 2026. Indian trekkers usually pay about ₹150 for the forest permit. Foreign trekkers usually pay around ₹600. Camping charges are separate. Many people spend weeks buying trekking shoes and warm clothes. Then they reach Sankri and remember the permit. That small mistake can delay the whole trip. The good news is that getting the permit is easy if you know the process before you travel. This guide explains the Kedarkantha trek permit forest fee 2026, the latest expected charges, where to get the permit, the documents you need, and a few simple tips to avoid last minute problems. Do You Need a Kedarkantha Trek Permit in 2026? Yes. Every person trekking to Kedarkantha needs a forest permit. The trail passes through the Govind Pashu Vihar National Park and Wildlife Sanctuary, so the Forest Department keeps a record of everyone entering the area. The rule is the same for Indian and foreign trekkers. If you book your trek with a registered trekking company, they usually get the permit for you. They collect your ID, pay the fee, and finish the paperwork before the trek begins. If you are trekking on your own, you must get the permit before leaving Sankri village. The permit is not just an entry ticket. It helps the Forest Department know how many people are on the trail. It also helps protect the forest and keep the route clean. Kedarkantha Trek Permit Forest Fee 2026 The Kedarkantha trek permit forest fee 2026 is expected to stay close to the rates charged in recent trekking seasons unless the Uttarakhand Forest Department announces new fees. Charge Expected Fee for 2026* Forest permit (Indian citizens) ₹150 per person Forest permit (Foreign nationals) Around ₹600 per person Camping fee ₹50 to ₹200 per tent, per night These are the latest expected charges based on recent Forest Department rates. The fees may change before or during the 2026 trekking season. The permit costs very little. Your travel, stay, food, and trekking gear will cost much more. If you are planning your overall budget, must know about Kedarkantha trek cost before you book. Why Do You Have to Pay the Forest Fee? Many trekkers ask this question, especially when they have already paid for a trekking package. Thousands of people visit Kedarkantha every winter. The trail needs care every day. The forest fee helps pay for that work. It helps support: Trail maintenance Waste collection Forest protection Wildlife conservation Visitor management A clean snow trail does not stay clean on its own. People work hard to keep it that way. Your permit fee helps make that possible. Where Do You Get the Kedarkantha Trek Permit? Most permits are issued at the Forest Department check post in Sankri, the base village for the trek. The check post comes under Govind Pashu Vihar National Park and Wildlife Sanctuary. In some cases, permits are handled through the Divisional Forest Officer (DFO) office in Purola, depending on the season and local rules. If you join a trekking company, you usually do not have to visit the office. The company takes care of the permit before your trek starts. If you are trekking on your own, reach Sankri early in the day. The permit counter gets busy in late December and early January. Many people arrive during Christmas and New Year.  If you are travelling on your own, read: how to travel from Dehradun to Sankri independently  Documents Needed for the Kedarkantha Trek Permit The paperwork is simple. Just make sure you carry the right documents before you reach Sankri. You will usually need: Aadhaar Card, Passport, Driving Licence, or another government photo ID Passport and valid visa for foreign trekkers Passport-size photos if asked Emergency contact details Trek booking details if you are with a trekking company Some trek organisers may also ask you to sign a fitness declaration before the trek begins. Carry both printed and phone copies of your ID. If your phone battery dies, you will still have your documents with you. You should also keep the other documents required for the Kedarkantha trek ready before leaving home. Who Gets the Permit? It depends on how you plan your trek. If you join a trekking company, the permit is usually included in the package. Still, ask before you book. It only takes a minute and avoids confusion later. If you are trekking on your own, you must get the permit, pay the forest fee, and finish the paperwork yourself. If this is your first Himalayan trek, a good trekking company makes life much easier. They usually take care of permits, camping, food, and local guides. You can spend more time enjoying the mountains and less time worrying about paperwork. Before booking, it is worth checking whether you meet the basic Kedarkantha trek eligibility requirements. Can You Trek Without a Permit? No. You should not enter the forest without a permit. Forest staff often check permits during the trekking season. If you do not have one, you may not be allowed to continue your trek. Imagine reaching Sankri after a long journey. Then you find out you cannot start the trek because one document is missing. That is not how anyone wants to begin a mountain trip. Take a few minutes to check your papers before you leave home. It can save your whole trek. Can You Get the Kedarkantha Permit Online? As of the latest available information, most permits are still issued through the Forest Department at Sankri or arranged by your trekking company. Rules can change from time to time. Before you travel, check with your trek organiser or the local Forest Department for the latest update. How Long Is the Permit Valid? The permit is valid only for your trekking dates. This helps the Forest Department count how many trekkers are on the trail each day. It also helps keep the forest from getting too crowded during the busy

Kedarkantha Trek Permit & Forest Fee 2026 Read More »