Uncategorized

Kedarkantha Trek in December

Emergency Exits on Kedarkantha Trek: Exit Points & Nearest Hospital

The main emergency exit points lead back to Sankri, where trekkers can reach a road and get help. If medical care is needed, Mori is usually the nearest place for treatment, while serious cases may need to be taken to Dehradun. Most people plan for the fun parts of the trek. They think about snow, camping, and summit views. Very few think about what they would do if they got sick or hurt on the trail. That is normal. Nobody starts a trek expecting a problem. Still, knowing the exit routes before you start can help you stay calm if something goes wrong. The good thing is that Kedarkantha Trek is one of the easier Himalayan treks when it comes to getting help. There are villages nearby, the trail is well known, and trekkers can return to lower ground without much difficulty. Also checkout: The fitness & Difficulty Guide Emergency Exit Points at a Glance Here is a simple overview of the main exit options. Trek Location Exit Route Road Access Medical Help Juda Ka Talab Return to Sankri Yes Mori Base Camp Descend to Sankri Yes Mori Summit Route Return to Base Camp and descend Yes Mori Sankri Direct road access Yes Mori or Purola The best exit route depends on where you are on the trail and how serious the problem is. Understanding the trek route map before your trip can make these exit points easier to understand. Also read the detailed guide on: Documents & ID for the trek. Why It Is Important to Know the Exit Routes Most trekkers finish Kedarkantha without any issues. Every year, thousands of people complete the trek safely. Even so, mountains can surprise you. A person may feel strong in the morning and unwell a few hours later. A small slip on snow can also lead to an injury. When people know their exit options, they make better choices. They do not panic or waste time figuring out what to do. This is why good trek leaders talk about safety before the trek starts.  Emergency Exit from Juda Ka Talab Juda Ka Talab is usually the first campsite on the trek. It is also one of the easiest places to leave the trail if needed. If a trekker gets a fever, feels very tired, or shows signs of altitude sickness The trail between Juda Ka Talab and Sankri is clear and well used. Because of this, getting help is usually easier here than at higher camps. Many early health problems show up on the first day. That is why guides watch trekkers closely during this part of the journey. Read here about: Backpack Offloading & Porters Emergency Exit from Kedarkantha Base Camp Kedarkantha Base Camp sits higher on the mountain and is usually much colder. Snow can also make walking slower. If a trekker cannot continue, the safest choice is often to descend to lower camps and then return to Sankri. For altitude sickness, coming down is often the best treatment. Many people start feeling better after losing some height. This is why guides take symptoms like dizziness, headache, and breathing trouble seriously. Emergency Exit from the Summit Route Summit day is the hardest day of the trek. Trekkers start before sunrise, and the climb is steeper than the earlier days. Sometimes a person feels weak or unwell during the climb. If that happens, turning back is usually the safest choice. Many trekkers feel tempted to keep going because the summit looks close. But no summit is worth risking your health. Most people who leave the trek from the summit route first return to Base Camp and then continue down to Sankri. Knowing what happens on Kedarkantha summit day can help trekkers prepare for these challenges. Nearest Hospital to Kedarkantha Trek One of the most common questions trekkers ask is where they can get medical help. Mori is usually the nearest place for basic treatment after reaching the road from Sankri. It is around 21 kilometres away and is often the first place trekkers go if they need medical care. Purola also has healthcare facilities and may be used depending on the situation. For serious injuries or major health problems, trekkers are often taken to larger hospitals in Dehradun. The journey can take several hours because mountain roads are slow and winding. This is why it is always better to speak up early if you feel unwell. Mobile Network During Emergencies Many people think they can simply make a phone call if something happens. In the mountains, it is not always that easy. Mobile signal becomes weak as you move higher on the trail. You may get some network in Sankri Village, but coverage is often poor during the trek. Before starting your trek: Tell your family about your route. Save important numbers on your phone. Download maps for offline use. Carry a fully charged power bank. A little preparation can save a lot of stress later. Emergency Numbers to Save Before leaving home, save these numbers: Ambulance: 108 Emergency Help: 112 Trek Operator Contact Family Contact You may never need these numbers, but it is always better to have them ready. Who Pays for an Emergency Evacuation? Many trekkers do not think about this until it is too late. Most trek package options include food, camps, guides, and permits. Emergency rescue or evacuation costs are usually not included. If extra transport or support is needed, the trekker may have to pay those costs. Because of this, many experienced trekkers buy travel or adventure insurance before their trip. Always check what your insurance covers before you leave. Common Reasons Trekkers Leave the Trail Most exits are not major rescue operations. They are simple decisions made at the right time. Some common reasons are: Altitude sickness Ankle injuries Knee pain Fever Stomach problems Extreme tiredness Breathing trouble Heavy snowfall Many of these problems improve once a person rests and moves to a lower altitude. How to Lower the Risk of an

Emergency Exits on Kedarkantha Trek: Exit Points & Nearest Hospital Read More »

kedarkantha trek

Kedarkantha Trek Documents: ID, Medical Certificate, Permit & Disclaimer

The Kedarkantha trek documents required are simple. You need a valid ID proof, a medical fitness certificate, a forest permit, and a signed disclaimer form. If you carry these documents, your trek can start without any last-minute trouble. Many people spend weeks buying warm clothes, trekking shoes, and backpacks. But they often forget about the paperwork. Then they reach Sankri and find out that an important document is missing. That can delay the trek or create stress before the journey even begins. The good news is that getting these documents ready is easy. Once you know what is needed, you can finish everything in a day or two and focus on enjoying the trek. Understand Kedarkantha trekking  can help you with the basics before you start. Also read: How Difficult the trek is Documents You Need for Kedarkantha Trek Before leaving for the trek, make sure you have these documents: Document Needed for Trek? Government ID Proof Yes Medical Fitness Certificate Yes Forest Permit Yes Disclaimer Form Yes Passport and Visa (Foreign Trekkers) Yes Passport-Size Photos Sometimes Trek Insurance Recommended Keep all these papers in one waterproof folder. Snow, rain, or a spilled water bottle can damage loose papers. Why Are These Documents Important? Many trekkers think these papers are only for office work. That is not true. They help keep trekkers safe and make the registration process smooth. Kedarkantha is a high-altitude trek. The trail goes through a protected forest area. Trek companies and forest officials need to know who is on the trail and whether they are fit for the trek.  These documents can also help during an emergency. If someone falls sick or needs help, the details are already available. Learning about altitude sickness on Kedarkantha Trek can help you understand why medical checks are taken seriously. Think of these papers as part of your trekking gear. They are just as important as your jacket or trekking shoes. Suggested read: Diamox for Kedarkantha ID Proof You Must Carry A government ID is one of the first things you will need for the trek. It proves who you are and helps match your booking details. You can carry: Aadhaar Card Passport Voter ID Card Driving Licence Carry the original ID if possible. We also suggest carrying two photocopies. Do not depend only on your phone. Mobile batteries die, and network problems are common in the mountains. A printed copy is always safer. Before you leave home, check that your ID is valid and easy to read. Read here about: Kedarkantha trek eligibility Medical Fitness Certificate Many people think they can skip the medical certificate because they feel healthy. That is not a good idea. Kedarkantha goes above 12,000 feet, and your body needs to be ready for the climb. Most trek companies ask for a certificate from a registered MBBS doctor. The doctor should sign it and add their stamp and registration number. Your certificate should include: Your name and age A basic health check A note saying you are fit for trekking Doctor’s signature Doctor’s registration number Doctor’s stamp or seal Try to get the certificate a few days before the trek. This gives you enough time if anything needs to be corrected. Forest Permit for Kedarkantha Every trekker needs a forest permit. The Kedarkantha trail passes through the Govind Pashu Vihar Wildlife Sanctuary, so permission is needed before entering the area. Most people do not need to arrange this permit on their own. Trek companies usually handle the process for the whole group. Permit rules and fees can change from time to time. Before booking, ask your trek company if the permit cost is included in the package.  Checkout the cost of: Kedarkantha trek package  The permit helps: Keep track of trekkers Protect the forest Improve safety Control crowding on the trail Without a permit, you cannot enter the trekking route. What Is a Disclaimer Form? A disclaimer form is a simple document that explains the risks of trekking. By signing it, you confirm that you understand these risks. Mountains are beautiful, but conditions can change quickly. Snow can fall suddenly. Trails can become slippery. Cold weather can make trekking harder. Most disclaimer forms include: Trekking risks Safety rules Guide instructions Emergency information You usually sign this form during registration or at the base camp. This often happens when trekkers reach Sankri village, the starting point of the trek. Documents for Foreign Trekkers If you are coming from another country, you need a few extra documents. Carry: Original Passport Valid Indian Visa Passport photocopies Passport-size photos Keep both printed and digital copies. It is always good to have a backup. Also read about: Backpack, offloading & porters Do You Need Passport Photos? Some trek companies ask for passport-size photos. Others may not need them. It is still smart to carry two or three recent photos. They take very little space and can save time if they are needed. Is Trek Insurance Needed? Trek insurance is usually not required for Kedarkantha. Still, many experienced trekkers suggest getting it. Insurance may help cover: Medical costs Emergency rescue costs Trip cancellation Accidents during the trek Most treks go smoothly. Even so, having insurance can give peace of mind. When Will Your Documents Be Checked? Many first-time trekkers ask this question. Your documents are usually checked: During booking At Sankri base camp Before entering the forest area Keep everything in one folder so you can find it quickly when needed. Common Mistakes to Avoid Many people forget small things while packing. These small mistakes can create big problems later. Try not to: Carry an expired ID Forget photocopies Miss the doctor’s stamp Carry only digital copies Forget passport photos Ignore permit details Take five minutes to check all your papers before leaving home. It can save a lot of trouble later. While checking documents, make sure you also review your Kedarkantha trek packing list 2026 so you do not miss any important gear. Final Checklist Before You Leave Before

Kedarkantha Trek Documents: ID, Medical Certificate, Permit & Disclaimer Read More »

Kedarkantha Winter Trek

Kedarkantha Trek Total Distance: 23 km Over 4 Days, Campsite by Campsite

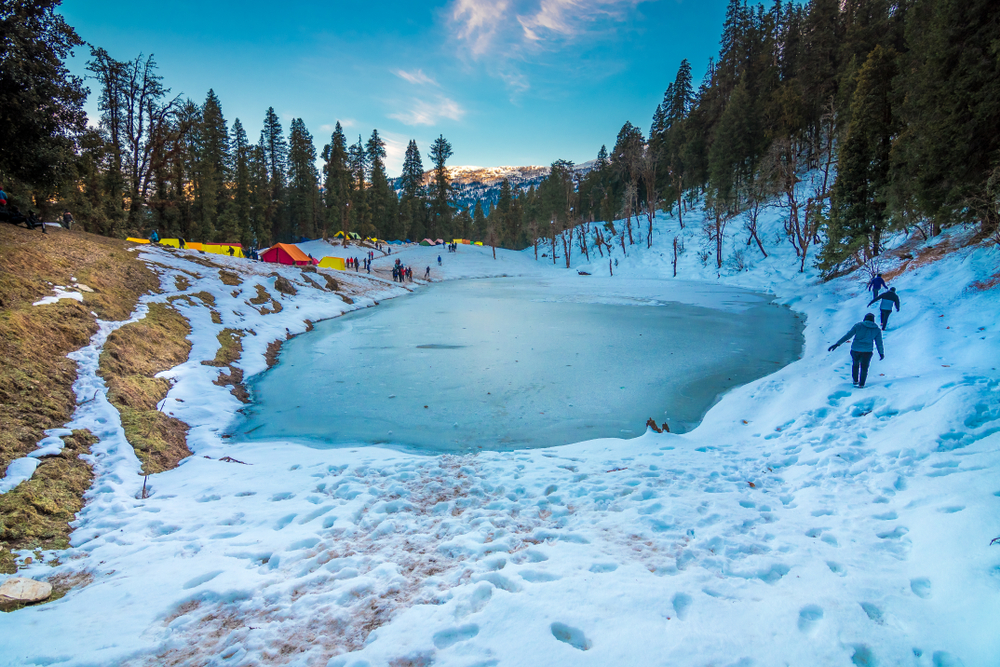
The Kedarkantha trek total distance 23 km is a common figure used by many trek operators that follow a 4-day itinerary. However, you may also see some websites mention 20 km. Both numbers can be correct because the total distance changes slightly based on the route, campsite location, and trek plan. If you are planning the trek, the best way to understand the distance is to look at it campsite by campsite. Once you see the daily walking distance and altitude gain, it becomes much easier to judge whether the trek is right for you. A  trek itinerary can also help you understand how the route is divided across different days. The good news is that Kedarkantha Trek is one of the most beginner-friendly winter treks in India. The daily walks are manageable, and the route gives your body enough time to adjust to the height. Also read about: How to start the Kedarkantha Trek Kedarkantha Trek Distance: Why Some People Say 20 km and Others Say 23 km One thing confuses many trekkers before booking the trek. Some websites say the trek is 20 km, while others say 23 km. The reason is simple. Not every operator follows the exact same itinerary. Some use different campsites. Others include a longer descent route. GPS devices can also show slightly different numbers in the mountains. For most trekkers, the total walking distance falls between 20 km and 23 km. If you choose a standard 4-day itinerary, the distance is often close to 23 km, which is why many operators use that figure. Also read: Arrival at Sankri Kedarkantha Trek Total Distance 23 km: Day Wise Breakdown Campsite by Campsite A typical 4-day route follows these camps: Day 1: Sankri to Juda Ka Talab – 4 km Day 2: Juda Ka Talab to Kedarkantha Base Camp – 4 km Day 3: Base Camp to Summit and Hargaon Camp – 11 km Day 4: Hargaon Camp to Sankri – 4 km Total Distance: Around 23 km The exact distance may vary slightly depending on snow conditions and the campsite chosen by your trek operator. Altitude Gain Matters More Than Distance Many first-time trekkers focus only on kilometres. In reality, altitude gain plays a much bigger role in how difficult the trek feels. Here is the height of each major point on the route: Location Altitude Sankri 6,400 ft Juda Ka Talab 9,100 ft Kedarkantha Base Camp 10,700 ft Kedarkantha Summit 12,500 ft Hargaon Camp 8,900 ft You gain more than 6,000 feet during the trek. That is why even a short distance can feel challenging at times. While most trekkers adjust well, it is important to understand the signs of altitude sickness on Kedarkantha trek before you start. The good thing is that the climb happens gradually. Your body gets time to adjust as you move higher each day. Day 1: Sankri to Juda Ka Talab (4 km) The trek starts from Sankri village, a small mountain village in Uttarkashi district. Most trekkers reach here after a long drive from Dehradun. The trail enters a thick forest of pine and oak trees. The climb is gentle and perfect for beginners. You do not need to rush. A steady pace works best. As you walk deeper into the forest, the noise of roads disappears. You hear birds, wind in the trees, and the sound of footsteps on the trail. After about three to four hours, you reach Juda Ka Talab. This beautiful lake is one of the highlights of the trek. During winter, it often freezes and looks like a scene from a postcard. Many trekkers spend the evening taking photos and enjoying the peaceful setting. Day 2: Juda Ka Talab to Kedarkantha Base Camp (4 km) The second day is short, but the views become much bigger. The forest slowly opens up as you gain height. Snow-covered clearings appear during winter months. The Himalayan peaks begin showing themselves through gaps in the trees. Many trekkers love this part of the journey because the landscape keeps changing. One moment you are inside a dense forest. The next moment you are walking through a wide snowy meadow. The climb remains steady and comfortable. By afternoon, you reach Kedarkantha Base Camp. This campsite offers some of the best mountain views on the trek. On a clear evening, the sunset colours spread across the snow-covered peaks. It is also the place where excitement starts building for summit day. Day 3: Kedarkantha Summit and Hargaon Camp (11 km) This is the biggest day of the trek and is often known as the Kedarkantha summit day among trekkers. Most groups start before sunrise. Headlamps light up the trail as trekkers begin the climb towards the summit. The route is steeper than previous days. Snow can make the climb slower, but most beginners complete it successfully with regular breaks. After a few hours, you reach the Kedarkantha Summit at 12,500 feet. The view from the top is worth every step. On a clear day, you can see famous Himalayan peaks such as Swargarohini, Bandarpoonch, Black Peak, and Ranglana. Snow-covered ridges stretch across the horizon in every direction. Many trekkers say this is the moment they remember most. After spending time at the summit, the trail descends towards Hargaon Camp. The downhill section can feel hard on the knees, especially if there is fresh snow. Trek poles help a lot during this part. By evening, you reach Hargaon Camp and enjoy your final night in the mountains. Day 4: Hargaon Camp to Sankri (4 km) The last day feels much easier. The trail descends through forests and open clearings. The air becomes warmer as you lose altitude. Many trekkers spend this walk sharing stories and photos from the previous days. There is a feeling of achievement, but also a little sadness that the trek is ending. Most groups reach Sankri before lunch. By this point, you have completed one of India’s most loved winter treks. Dehradun to Sankri Distance: An

Kedarkantha Trek Total Distance: 23 km Over 4 Days, Campsite by Campsite Read More »

Where Is Kedarkantha?

Diamox for Kedarkantha Trek: Should You Take It? Complete Guide

You may not need Diamox for the Kedarkantha Trek, but some trekkers use it to help their body adjust to the height and lower the chance of altitude sickness. If you are planning your first Himalayan trek, you have probably heard about Diamox already. Someone in a trekking group may tell you to carry it. A friend may say it helped them on another trek. Then you read a few articles online and end up even more confused. So, should you take Diamox for Kedarkantha? For most people, the answer is simple. Do not take it unless your doctor advises it. Many trekkers complete the Kedarkantha winter trek without using Diamox at all. Others may benefit from it because of their health history or past problems at altitude. The best choice depends on your body, not on what someone else did on their trek. Medical Disclaimer: This article shares general trekking information. It is not medical advice. Always speak with a qualified doctor before taking Diamox or any other medicine. What Is Diamox? Diamox is a medicine that doctors sometimes recommend for people going to higher places. When you climb higher in the mountains, there is less oxygen in the air. Your body needs time to adjust to this change. Most people adjust naturally. Some people find it harder. They may get headaches, feel sick, or become very tired. In some cases, a doctor may suggest Diamox to help the body adjust better. Many trekkers carry it on Himalayan treks. That does not mean everyone needs it. Can You Get Altitude Sickness on Kedarkantha? Yes, you can. The Kedarkantha summit is about 12,500 feet above sea level. That is high enough for some people to feel the effects of altitude. Most trekkers feel fine. Still, a few people may notice signs of Acute Mountain Sickness, often called AMS. If you want a deeper understanding of the symptoms and prevention methods, read our guide on altitude sickness on Kedarkantha Common signs include: Headache Dizziness Feeling sick Loss of appetite Poor sleep Feeling more tired than normal These signs are usually mild. Many people feel better after resting, drinking water, and giving their body time to adjust. Why Do Some Trekkers Take Diamox? People take Diamox because they want to lower the risk of altitude sickness. This is more common among trekkers who have had altitude problems before. For example, someone may have felt unwell on another Himalayan trek. Because of that experience, their doctor may suggest carrying Diamox for future mountain trips. That does not mean every trekker should do the same. Your health history matters more than someone else’s experience. Who Should Talk to a Doctor About Diamox? You should speak with a doctor if: You have had altitude sickness before You have asthma or breathing problems You have kidney problems You have heart conditions You take regular medicines You are unsure about your fitness for high altitude A doctor can decide if Diamox is suitable for you. Never start taking it because someone in a trekking group recommends it. What About Diamox Dosage? Many websites mention exact Diamox doses. You may see different numbers on different pages. That can be confusing and sometimes unsafe. The correct dose depends on your age, weight, health, and medical history. Only your doctor can tell you if you need Diamox and how it should be used. Do not copy another person’s dosage plan. Are There Any Side Effects? Yes. Like most medicines, Diamox can cause side effects. Some people notice: Tingling in fingers Tingling in toes More trips to the toilet Feeling thirsty Mild stomach upset Feeling tired Most side effects are mild. Still, it is important to know about them before taking the medicine. That is another reason why medical advice matters. Diamox Is Not a Magic Pill This is one of the biggest mistakes new trekkers make. They think taking Diamox means they do not need to worry about altitude anymore. That is not true. Good trekking habits are still the most important part of staying healthy. You should: Drink water often Eat your meals properly Walk at a steady pace Sleep well Avoid alcohol Listen to your body Even people taking Diamox need to follow these basic rules. A proper trek packing list should also include water bottles, warm clothing, and basic medicines that support healthy trekking habits. Serious Altitude Problems You Should Know Most trekkers only get mild symptoms. But serious altitude illness can happen. Two dangerous conditions are called HAPE and HACE. You do not need to remember the long names. What matters is knowing the warning signs. Get help immediately if you notice: Trouble breathing Breathlessness while resting Confusion Trouble walking Loss of balance Extreme weakness Continuous vomiting Strange behaviour These are emergency signs. Medicines alone may not solve the problem. Moving to a lower altitude and getting medical help is often the safest choice. No summit is worth risking your life. Also read about here: Emergency exits on the trek Should Beginners Take Diamox? Not always. Kedarkantha is known as one of the most popular treks for beginners in India. Thousands of first-time trekkers complete it every year. Most of them do not need altitude medicine. Beginners should focus more on preparation than medication. A healthy body, proper hydration, enough sleep, and good trekking habits usually matter much more. Read here about: How difficult the trek is   Other Useful Items for Your Medical Kit Diamox is only one small part of a kedarkantha trek medical kit. You should also carry a few basic health items. Useful items include: ORS sachets Fever medicine Pain relief medicine Motion sickness medicine Antacid tablets Band-aids Crepe bandage Sunscreen SPF 30+ SPF lip balm Water purification tablets If you are renting equipment locally, many shops offering trekking gear rental in Sankri can also guide you on essential trekking items. A warm sleeping bag for Kedarkantha is equally important because good sleep helps your body adjust better to altitude. When

Diamox for Kedarkantha Trek: Should You Take It? Complete Guide Read More »

Kotgaon Village The Hidden Gem That Starts the Kedarkantha Journey

Kedarkantha Trek Medical Kit: 7 Medicines & When to Use Each

A good Kedarkantha trek medical kit should have medicines for altitude sickness, fever, pain, dehydration, stomach problems, and travel sickness because medical help may not be close by on the trek. Many people spend a lot of time buying trekking shoes, jackets, and backpacks. But when it comes to medicines, they often pack whatever they find at home. That is not the best idea. The Kedarkantha Trek is one of the best beginner treks in India. Still, you will be walking in cold weather, sleeping in tents, and climbing to about 12,500 feet. Small health problems can happen even on an easy trek. The good news is that you do not need a big medical box. A few useful medicines and first-aid items are enough for most trekkers. Medical Disclaimer: This article shares general trekking tips. It is not medical advice. Always speak with your doctor before taking any medicine, especially if you have asthma, allergies, diabetes, heart problems, or any other health condition. Why Carry a Medical Kit on Kedarkantha Trek? Most trekkers finish Kedarkantha without any serious health problems. But small issues are common. You may get a headache after a long day of walking. Some people feel sick during the drive to Sankri. Others may feel tired because of the cold or the altitude. A simple medical kit helps you deal with these problems quickly. It also gives you peace of mind during the trek. Understanding Altitude on Kedarkantha Many people think altitude sickness only happens on very high mountains. That is not true. The Kedarkantha summit is about 12,500 feet high. At this height, some people may get a headache, feel dizzy, lose their appetite, or feel more tired than usual.  Before your trek, it helps to understand the symptoms of altitude sickness on Kedarkantha Trek and how to respond to them. Most trekkers are fine. Still, it is good to know the signs and carry the right medicines. Medicine 1: Diamox for Altitude Sickness Diamox is one of the most common medicines carried on Himalayan treks. Some trekkers use it to help with altitude sickness. Signs of altitude sickness may include: Headache Dizziness Feeling sick Loss of appetite Unusual tiredness Only take Diamox if your doctor advises it. Do not take it just because someone else on the trek is using it. Medicine 2: Dolo 650 for Fever and Headache A headache does not always mean altitude sickness. Sometimes it happens because you are tired, cold, dehydrated, or did not sleep well. Good rest is important, which is why carrying the right sleeping bag for Kedarkantha can make a big difference. Dolo 650 is commonly used for fever and normal headaches. If the headache becomes very strong or comes with vomiting, breathing problems, or confusion, tell your trek leader right away. Medicine 3: Combiflam for Body Pain Your legs will work hard on this trek. Many first-time trekkers feel sore after a long climb or descent, especially during the challenging Kedarkantha summit day. Combiflam can help with body pain and muscle soreness. But do not use painkillers to ignore a serious injury. Pain is often your body’s way of telling you something is wrong. Medicine 4: ORS for Dehydration ORS is one of the most important things you can carry. Many people drink less water in winter because they do not feel thirsty. That can lead to dehydration. Watch for signs such as: Dry mouth Headache Feeling weak Feeling dizzy Dark yellow urine ORS helps replace water and salts lost by your body. Carry a few sachets in your backpack. They take almost no space. Medicine 5: Avomine for Travel Sickness The road from Dehradun to Sankri has many sharp turns. Some people enjoy the mountain drive. Others start feeling sick after a few bends. If this is your first visit, it is must to know that how to reach Kedarkantha Trek can help you prepare for the long mountain journey. If you often get motion sickness while travelling, Avomine may help. Speak with your doctor before using it because it can make some people sleepy. Also checkout here: Emergency exits on the Trek Medicine 6: Medicine for Stomach Upset A stomach problem is not very common on organised treks. Still, it can happen. Travel, different food, or a sensitive stomach can sometimes cause loose motions. Ask your doctor which medicine is suitable for you before the trek. If you get sick, keep drinking water and use ORS to stay hydrated. Medicine 7: Antacid for Acidity Long journeys and irregular meal times can sometimes upset your stomach. Some trekkers also get acidity after eating spicy food. A simple antacid can help you feel better. Many people find it useful during travel days before and after the trek. Allergy Medicine Can Also Be Useful Some trekkers carry a doctor-approved allergy medicine. This can help if you react to dust, cold weather, insect bites, or certain foods. If you have a history of allergies, speak with your doctor before the trek. Suggested read: Documents & ID for the trek. Other Health Items Worth Carrying Medicines are only one part of your kit. These items can also be very useful. You can combine them with your Kedarkantha trek packing list so that nothing important gets left behind. Band-aids Crepe bandage Antiseptic cream Cotton Gauze Medical tape Hand sanitiser Blister pads Sunscreen SPF 30+ Lip balm with SPF Water purification tablets Medicines prescribed by your doctor Many trekkers forget sunscreen during winter. That is a mistake. Snow reflects sunlight and can cause sunburn even on cold days. If You Have a Health Condition If you take regular medicines, carry enough for the whole trip. Carry a little extra too. If you use an inhaler, insulin, or allergy medicine, keep it where you can reach it quickly. Also tell your trek leader about any important medical condition before the trek starts. Medical Fitness Certificate Many trekking companies ask for a fitness certificate before the trek. You should also check

Kedarkantha Trek Medical Kit: 7 Medicines & When to Use Each Read More »

Juda Ka Talab The Frozen Lake That Stops Every Trekker in Their Tracks

Why Wet Wipes Are Banned on Kedarkantha Trek: Zero-Waste Trekking

Wet wipes are banned or strongly discouraged on the Kedarkantha trekking because they do not break down easily and can harm the mountains, forests, water sources, and wildlife. Many trekkers feel surprised when they hear this rule. A wet wipe looks small. It does not seem like a big problem. But when thousands of trekkers use them every year, the waste quickly adds up. If you are planning the trek, it helps to understand why this rule exists. Once you know the reason, it becomes much easier to follow. Also checkout: Best shoes for Kedarkantha Why Wet Wipes Are Not Good for the Mountains Most people think wet wipes are made of paper. They are not. Most wet wipes contain plastic fibres. These fibres help the wipes stay strong and wet. The problem is that plastic does not break down quickly in nature. A wet wipe thrown on the trail may stay there for many years. This is one reason why many trek operators follow a sustainable and eco-friendly approach on the Kedarkantha winter trek. They want to keep the mountain clean for future trekkers. What Happens When Wet Wipes Are Left Behind? Many people think a wet wipe will disappear after a few months. That usually does not happen. Snow covers the ground during winter. When the snow melts, the wipes often appear again. They get stuck in bushes, near campsites, or along the trail. Over time, this waste spoils the beauty of the trek. The Kedarkantha trail passes through beautiful forests, open meadows, and peaceful campsites. Places like Juda Ka Talab are known for their natural beauty, and nobody wants to see plastic waste scattered around them. Wet Wipes Can Harm Wildlife The problem is not only about litter. Animals can also suffer. Used wipes may carry food smells, soap, or other scents. Wild animals can be attracted to them. Some animals may chew or swallow them by mistake. Plastic can make animals sick. The forests around the trek are part of the Govind Pashu Vihar Wildlife Sanctuary, which is home to many birds and animals. Keeping the trail clean helps protect their home. How Zero-Waste Trekking Works Many trekking companies now follow strict waste rules. As you move from Sankri Village to Juda Ka Talab and then towards Kedarkantha Base Camp, guides often remind trekkers not to leave anything behind. The idea is simple. Whatever you carry up the mountain should come back down with you. This is the heart of zero-waste trekking. It helps keep campsites clean and reduces the amount of rubbish left in the mountains. Why Trek Operators Use Steel Cutlery You may notice that many trek companies use steel plates, steel mugs, and steel spoons. There is a good reason for this. Steel items can be washed and used again and again. They create almost no waste. Plastic plates and disposable cups are used once and then thrown away. This is why the no wet wipes and steel cutlery model has become popular among responsible trekking companies. A small change like using steel cutlery can prevent a lot of waste. What Can You Use Instead of Wet Wipes? Many first-time trekkers worry about staying clean. The good news is that there are better options. You can carry: A small quick-dry towel A handkerchief Hand sanitiser Biodegradable soap sheets A reusable cloth These items work well and create much less waste. Many experienced trekkers use them on every trek. If you are preparing your gear, a good Kedarkantha packing list can help you choose eco-friendly essentials before you leave home. What About Toilets on the Trek? This is a common question. Most organised treks provide toilet tents or eco-friendly toilet setups at campsites. These systems work better when plastic waste stays out. Wet wipes do not break down properly. They make waste handling much harder. That is why guides often ask trekkers to carry such waste back to the base. It may seem like a small effort, but it helps keep the campsites clean. Also chekout: Sleeping bag for Kedarkantha Menstrual Waste on the Trek Women complete the trek every season. The key is planning ahead. Some trekkers prefer menstrual cups because they can be reused and create very little waste. Others use sanitary products and carry them back in sealed bags. The rule is simple. Nothing should be left on the mountain. This helps keep the trail clean for everyone. Why These Rules Matter Kedarkantha has become one of the best winter treks in India and attracts thousands of trekkers every year. If every trekker leaves behind even a small amount of waste, the problem becomes huge. Clean trails do not stay clean by luck. They stay clean because trekkers, guides, and local teams work together to protect them. When everyone does their part, the mountain stays beautiful. Simple Zero-Waste Tips for Trekkers You do not need to change everything. A few simple habits make a big difference. Carry a reusable water bottle. Avoid wet wipes when possible. Use a quick-dry towel. Bring reusable items. Carry your waste back. Avoid single-use plastic. Follow your guide’s instructions. Respect nature and water sources. Small actions from many people create a big result. FAQs Are wet wipes banned on the Kedarkantha Trek? Many trek operators discourage or ban them because they create waste that does not break down easily. Can I bury wet wipes? No. Most wet wipes contain plastic fibres and can stay in the soil for many years. Are biodegradable wipes allowed? Some operators may allow them, but rules can differ. Always check before your trek. Why do trek companies use steel cutlery? Steel cutlery can be reused many times and creates almost no waste. Is zero-waste trekking really important? Yes. Thousands of trekkers visit Kedarkantha every year. Without good waste rules, the trail would quickly become polluted. The mountains give us clean air, beautiful views, and unforgettable memories. The least we can do is leave them as clean as we found them

Why Wet Wipes Are Banned on Kedarkantha Trek: Zero-Waste Trekking Read More »

Where Is Kedarkantha?

Kedarkantha Trek Layer System: Exact Warm Layers Needed by Season

If you are wondering how many warm clothes you need for Kedarkantha, the simple answer is this: carry 5 layers in winter, 4 layers in autumn, 3 layers in spring, and 2 warm layers in summer. Many trekkers worry about the packing list. Some carry too much and end up with a heavy backpack. Others bring too little and spend cold nights wishing they had packed better. The right layer system helps you stay warm without carrying extra weight. The good thing is that Kedarkantha Trek does not need expensive mountaineering clothing. You simply need the right layers for the season you are trekking in. Why the Kedarkantha Trek Warm Layers Season Matters Kedarkantha weather changes fast. A sunny morning can feel pleasant. An hour later, cold wind may make you reach for another layer. Many first-time trekkers think one thick jacket will solve everything. It rarely does. Good warmth comes from several layers working together. Each layer has a job. One moves sweat away from your skin. Another traps body heat. The outer layer blocks wind and snow. This is why experienced trekkers use a layer system instead of one bulky jacket. If this is your first Himalayan adventure,  Read the complete guide on: Gear Rental in Sankri Kedarkantha Temperature by Season Before choosing your clothes, it helps to know what temperatures you may face. Season Day Temperature Night Temperature December to February -2°C to 4°C -10°C to -15°C March 2°C to 8°C -5°C to -8°C April 5°C to 12°C -2°C to 3°C May to June 10°C to 18°C 3°C to 8°C September to November 5°C to 15°C 0°C to -5°C The colder the temperature, the more layers you need. Simple. If you are still deciding when to visit, check our detailed guide on the: best time to visit Kedarkantha Trek. Understanding the Three Main Layers Every clothing system has three basic parts. Base Layer This sits next to your skin. Its job is to move sweat away from your body. A good base layer keeps you dry. A wet base layer makes you cold. Mid Layer This layer traps body heat. A fleece jacket is the most common mid-layer on Kedarkantha. It keeps you warm while walking and resting. Outer Layer This protects you from wind, snow, and light rain. A waterproof shell or windproof jacket works well for this job. Kedarkantha Winter Layer System: 5 Layers Winter is the most popular season on the trek. This is when you see snow-covered forests and white mountain slopes. It is also the coldest time of the year. Trekkers joining a winter trek should pay extra attention to their layering system. For winter departures, we recommend: Thermal base layer Trekking T-shirt Fleece jacket Down or insulated jacket Waterproof shell jacket You may not wear all five layers while climbing. Most trekkers remove one layer while walking uphill. At campsites and during summit morning, all five layers often come into use. Winter temperatures can fall below -10°C at night. That is why a proper layering system matters so much. Spring Layer System: 3 Layers Spring usually means March and April. However, these months are not the same. March still feels close to winter. Snow often remains on the trail. Many trekkers carry an extra warm layer during this month. April feels much warmer. The days are comfortable and the snow starts melting on lower sections. For most spring departures: Base layer or dry-fit T-shirt Fleece jacket Windproof shell Carry an insulated jacket in your backpack for evenings and campsites. Summer Layer System: 2 Warm Layers Many people forget that Kedarkantha is also trekked during May and June. The weather becomes much friendlier during these months. Days are warmer and nights are not as harsh. Most trekkers only need: Moisture-wicking base layer Fleece jacket for mornings and evenings Keep a lightweight shell for unexpected weather. This is the easiest season when it comes to clothing. Autumn Layer System: 4 Layers Autumn offers clear skies and beautiful mountain views. The days feel pleasant, but nights can become cold. As winter approaches, temperatures drop quickly after sunset. A good autumn clothing system includes: Base layer Trekking T-shirt Fleece jacket Insulated jacket A waterproof shell should still stay in your backpack because mountain weather can change suddenly. Don’t Forget Lower Body Layers Many beginners focus only on jackets. That is a mistake. Your legs also need protection from the cold. For winter: Thermal lower Trek pants Fleece lower for campsites For autumn and spring: Thermal lower Trek pants For summer: Trek pants are usually enough Summit mornings often feel much colder than expected. Good lower-body layering makes a big difference, especially during the final climb described in our Summit Day guide. Best Fabrics for Kedarkantha The fabric matters almost as much as the layer itself. Choose: Merino wool Polyester Synthetic trekking fabrics Avoid: Cotton thermals Cotton T-shirts Heavy cotton sweatshirts Cotton holds moisture. Once it gets wet with sweat, it becomes cold and uncomfortable. This is one of the most common mistakes we see on Himalayan treks. Also checkout here: Why wet wipes are banned How Many Clothes Should You Carry? Many trekkers ask for exact numbers. For a typical 5-6 day trek, which is the standard duration mentioned in most trek Itineraries, carry: 2 thermal upper sets 2 thermal lower sets 2 trekking T-shirts 1 fleece jacket 1 insulated jacket 4 to 5 pairs of socks 2 pairs of gloves 1 woollen cap 1 buff or neck warmer The Two-Glove System That Works Best Cold hands can ruin an otherwise enjoyable trek. A simple two-glove system works well. First, wear fleece liner gloves. These keep your hands warm around camp. Second, carry waterproof outer gloves. These protect against snow, wind, and moisture. Always carry a spare pair if possible. Wet gloves are difficult to dry in winter conditions. Your Sleeping Bag Matters Too Even the best layers cannot replace a good sleeping bag. For peak winter departures, a sleeping bag rated around -15°C

Kedarkantha Trek Layer System: Exact Warm Layers Needed by Season Read More »

kedarkantha trek

Day 5 Kedarkantha Trek: Juda Ka Talab to Sankri, Drive to Dehradun & Return Journey Guide

The day 5 Kedarkantha Trek is easy. You walk down from Juda Ka Talab to Sankri and then drive back to Dehradun. The trek part takes around 3 to 4 hours, while the drive usually takes 9 to 10 hours. Important: Some trek operators camp at Hargaon Camp after the Kedarkantha summit day. If your Day 5 starts from Hargaon instead of Juda Ka Talab, the walk to Sankri is shorter and usually takes 2 to 3 hours. Quick Facts: Day 5 Juda Ka Talab Sankri Starting Point: Juda Ka Talab (around 9,100 ft) Alternate Starting Point: Hargaon Camp Trek Distance: 4 to 5 km Trek Time: 3 to 4 hours Ending Trek Point: Sankri Village Drive Distance: Around 185 km Drive Time: 9 to 10 hours Final Destination: Dehradun (around 1,400 ft) This is the easiest day of the trek. There is no steep climb. There is no summit push. Your main task is to walk safely downhill and prepare for the long drive home. Kedarkantha Trek Day 5 Juda Ka Talab Sankri Trail Most groups start after breakfast. The trail goes through the same forest route that you used while coming up from Sankri earlier in the trek. At first, the downhill feels easy. Your lungs feel relaxed because you are losing height. The air also feels warmer as you get closer to Sankri. Many trekkers think downhill is always easier than uphill. That is only partly true. Your knees and ankles work harder while walking down. If there is snow on the trail, some sections can become slippery. A few simple things help during the descent: Walk at a steady pace. Avoid running downhill. Use trekking poles if you have them. Watch your footing on snowy patches. Take short breaks if your knees feel tired. Also read here about: How many days for Kedarkantha Trek What Makes the Last Trek Day Special? Day 5 is not about reaching a summit day. It is about slowing down and enjoying the last few hours in the mountains. You may notice things that you missed while climbing. A small stream beside the trail. Sunlight coming through the trees. Bird sounds in the forest. When there is no pressure to climb higher, you enjoy the journey in a different way. For many trekkers, this is when the whole trek starts to sink in. The memories of Kedarkantha Summit Day are now behind you. The hard work is done. All that remains is the walk back to Sankri. Reaching Sankri Village Most groups reach Sankri Village by late morning. This small village is the starting point for many famous treks in Uttarakhand. After several days in camps, Sankri feels lively. You will see local homes, small shops, guesthouses, and cafés. Before leaving for Dehradun, many trekkers relax here for a while. Some enjoy hot tea. Others charge their phones, buy snacks, or simply sit and enjoy the mountain views one last time. If you are looking for local souvenirs, you can also explore options for shopping in Sankri. If you have extra time, you can visit the Someshwar Mahadev Temple. The temple is known for its traditional wooden design and gives a glimpse into local culture. Useful Things to Know About Sankri Many trekkers search for these answers before reaching Sankri. ATM Availability There is no reliable ATM in Sankri. It is best to carry enough cash before starting the trek. Most trekkers use the ATM at Purola, which is one of the last major stops before reaching Sankri. Mobile Network Mobile networks are limited in Sankri. BSNL and Jio usually work better than other networks, but signals can still be weak. As you travel towards Dehradun, network coverage improves. Charging Facilities Most guesthouses and homestays in Sankri have electricity. You can usually charge your phone, camera, and power bank before the drive. Food Options You can find simple and filling meals in Sankri. Common food options include: Maggi Paratha Rajma Chawal Tea and coffee Basic North Indian meals Sankri to Dehradun Drive Guide The drive back to Dehradun is long but scenic. Most trekking groups leave Sankri between 11 AM and 12 PM after everyone has reached the village and freshened up. The road follows the same route that you used while coming to Sankri.You pass through Mori, Netwar, Purola, Naugaon, and later move towards Dehradun. The Tons River stays beside the road for many stretches. The views are beautiful, but mountain roads can be slow. During winter, road conditions may change due to snowfall. Sections near Mori and Purola can become slippery after fresh snow. This is one reason why travel times sometimes increase. Most groups stop once or twice for lunch and tea. Small roadside dhabas are common along the route. The food is simple but fresh. You will usually reach Dehradun between 8 PM and 10 PM, though delays can happen because of traffic, weather, or road work. Planning Your Journey After Reaching Dehradun Many trekkers head straight to Delhi after reaching Dehradun. If you plan to travel on the same night, keep a buffer of several hours. Mountain roads are unpredictable, and delays are common. Some trekkers prefer staying one night in Dehradun. This gives the body time to recover after five days in the mountains. It also reduces stress if your train or flight schedule is tight. If you are booking onward transport, avoid choosing options that leave immediately after your expected arrival time. How to Recover After the Trek Even though Day 5 is easy, your body has already completed several days of trekking. If this was your first high-altitude adventure, you may also want to understand the overall trek difficulty and recovery process for future treks. A few simple recovery tips can help: Drink plenty of water. Eat a proper meal after reaching Dehradun. Stretch your legs in the evening. Get a full night’s sleep. Give your knees and ankles some rest. Many trekkers feel slight soreness for a day or two. This

Day 5 Kedarkantha Trek: Juda Ka Talab to Sankri, Drive to Dehradun & Return Journey Guide Read More »

Juda Ka Talab The Frozen Lake That Stops Every Trekker in Their Tracks

Day 4 Kedarkantha Trek: Summit Day & Descent to Juda Ka Talab

The Kedarkantha trek Day 4 summit day is the biggest highlight of the trek. You wake up before sunrise, climb to the 12,500 ft summit, enjoy stunning Himalayan views, and then descend through snowy trails back to Juda Ka Talab. For many trekkers, this is the day they remember long after the trek ends. It is the hardest day of the trek, but it is also the most rewarding. Quick Facts: Start Time: 3:00 AM to 4:00 AM Summit Altitude: 12,500 ft (3,800 m) Distance to Summit: Around 4 km Total Distance for the Day: Around 8 km Time to Reach Summit: 2 to 4 hours Total Trekking Time: 7 to 9 hours End Point: Juda Ka Talab Camp Difficulty Level: Moderate What Happens on Day 4? Day 4 starts while it is still dark outside. Most trekking groups leave the campsite with headlamps and warm layers. The goal is to reach the summit around sunrise when the mountain views are at their best. The climb feels very different from previous days. The air is colder. The trail is steeper. The excitement is higher too. Every step takes you closer to one of the most famous winter summits in India and the highlight of the entire Kedarkantha Trek. Once you reach the top, you spend some time enjoying the views, taking photographs, and resting. After that, the descent begins towards Juda Ka Talab, where you spend the night. Why We Start Before Sunrise Many first-time trekkers ask the same question. Why wake up at 3 AM when the summit is only a few kilometres away? The answer is simple. Sunrise from Kedarkantha is one of the main reasons people do this trek. Watching the first sunlight touch the snow-covered peaks is an unforgettable experience. The early start also helps trekkers walk on firmer snow. Later in the day, the snow can become softer because of the sun. There is another reason too. Summit day is long. Starting early gives enough time to climb, descend safely, and reach camp before evening. Kedarkantha Trek Day 4 Summit Day Route The route from Kedarkantha Base Camp to the summit can be divided into four sections. Knowing what comes next makes the climb much easier mentally. Base Camp to the Forest Edge The trek starts in darkness. Your headlamp lights up the trail while the stars shine above. On clear nights, the famous night sky creates an unforgettable start to summit day. Most trekkers find this part comfortable. The trail passes through snowy patches and open areas around the campsite. Forest Edge to Open Snow Slopes After some time, the trees become fewer and the mountain opens up. This is where you begin to see wider views of the valley below. As dawn approaches, the sky slowly changes colour. Many trekkers stop for a few moments just to enjoy the scene. The Final Climb This is the steepest section of the day. Depending on snow conditions, some parts can feel quite demanding. The final slope is often the part people talk about most after the trek. During winter, fresh snow can make the climb slower. Small and steady steps work best here. If you feel tired, do not rush. Almost everyone slows down on this section. Reaching the Summit The summit comes into view suddenly. After hours of climbing in the cold, standing at the top feels special. Most trekkers spend 20 to 40 minutes here depending on weather conditions. What You See at the Kedarkantha Summit The summit is much more than just a viewpoint. At the top, you will find a stone platform with a large Trishul standing proudly against the sky. This is one of the most photographed spots on the trek.  There is also a small shrine linked to local beliefs about Lord Shiva and Lord Ganesha. Every year, local villagers visit the summit as part of traditional worship. On a clear day, you can see several famous Himalayan peaks and valleys.  Read our guide to the: peaks visible from Kedarkantha summit. Some of the major sights include: Swargarohini Peak Bandarpoonch Peak Black Peak Ranglana Peak Gangotri Range Yamunotri Range Har Ki Dun Valley Chaainsheel Pass Kinner Kailash Range The 360-degree view is one of the reasons Kedarkantha is loved by first-time trekkers and is often considered one of the reasons why it is the best first summit trek in India. The Story Behind Kedarkantha Many local people believe that Lord Shiva once chose this mountain as a place for meditation. According to a popular story, Shiva was disturbed while meditating here. He later moved to the place where the famous Kedarnath Temple stands today. Whether you believe the story or not, it adds a special feeling to the summit. The Trishul at the top reminds visitors of this local connection. The Descent Back to Juda Ka Talab After enjoying the summit, it is time to head down. Many trekkers think the hardest part is over. In reality, the descent to sankri needs just as much attention. Snow-covered trails can be slippery, especially later in the day. The first section back to base camp is usually the steepest. Trekking poles help a lot here. Many trekkers also choose a trek offloading porter if they prefer not to carry a heavy backpack during steep sections. Once you reach base camp, most groups take a short break and have lunch. After resting, the journey continues towards Juda Ka Talab. The trail passes through beautiful  pine oak forests that look completely different in daylight compared to the early morning climb. Most trekking groups reach Juda Ka Talab to base camp by late afternoon. After a long day on the mountain, the calm atmosphere of the campsite feels well earned. What If You Cannot Reach the Summit? Many beginners worry about this before summit day.p The good news is that you are never expected to trek alone. Trek leaders and support staff keep an eye on the group throughout the climb. If someone

Day 4 Kedarkantha Trek: Summit Day & Descent to Juda Ka Talab Read More »

Kedarkantha Winter Trek

Day 3 Kedarkantha Trek: Juda Ka Talab to Base Camp

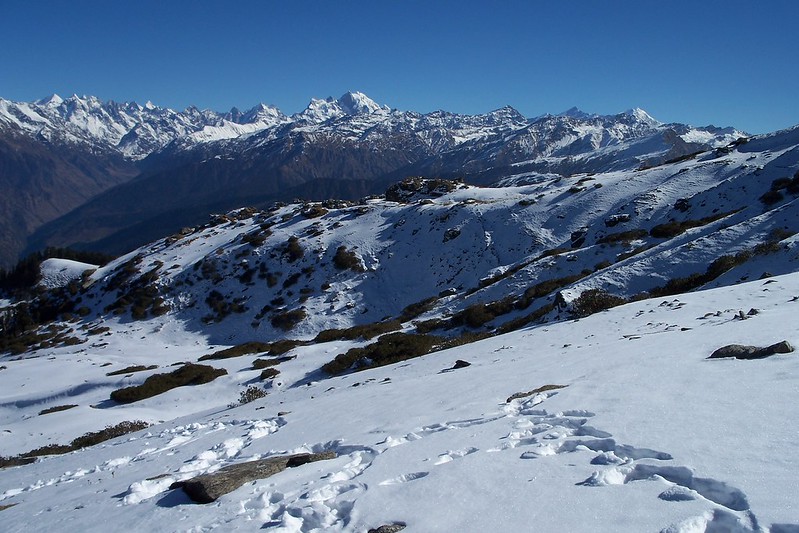
If you are wondering what Day 3 of the Kedarkantha Trek is like, this is the day you trek from Juda Ka Talab to Kedarkantha Base Camp, gain around 2,000 feet in height, and get some of the best mountain views of the entire trek. For many trekkers, this is the most beautiful day before the summit climb. The trail leaves the thick forest behind and slowly opens to wide views of snow-covered peaks. You start the day beside Juda Ka Talab and end it at the foot of Kedarkantha Peak. That change in scenery makes Day 3 special. Most trekking groups leave Juda Ka Talab after breakfast. The climb is not very long, but you will gain height steadily throughout the day. Walking at a slow and steady pace is the best way to enjoy the journey. Also read about: Arrival at Sankri Kedarkantha Trek Day 3 Juda Ka Talab Base Camp Overview The distance from Sankri to Juda Ka Talab is 4 kilometres and the Kedarkantha Base Camp is usually between 3 km and 4 km. Some trekking companies mention 3.5 km, while others may list a slightly different distance because campsite locations can vary. The trek normally takes 3 to 5 hours. Snow conditions, fitness level, and weather can affect the time. If you are following a complete trek itinerary, this is usually the third day of trekking before the summit day. Quick Facts Starting Point: Juda Ka Talab Ending Point: Kedarkantha Base Camp Distance: Around 3 to 4 km Starting Altitude: Around 9,100 ft Base Camp Altitude: Around 11,250 ft Trek Time: 3 to 5 hours Difficulty Level: Easy to Moderate The distance may seem short, but the climb is steady. You gain a good amount of altitude in a few hours. What to Expect on the Trail The day starts with a walk through the famous pine and oak forests of Kedarkantha. During winter, snow often covers the entire trail. Early in the morning, the snow can feel hard and crunchy under your boots. After about an hour of trekking, the forest begins to open up. You start getting wider views of the valleys and nearby peaks. This is usually where many trekkers stop for a short break and take photos. As you move higher, you may come across open meadows that local shepherds use during the warmer months. In summer, these meadows are green and full of life. In winter, they often lie under a thick layer of snow. The final section towards base camp is slightly steeper than the earlier part of the trail. It is not difficult, but you may feel the effect of the altitude. Taking small steps and keeping a steady pace helps a lot. Route Landmarks on Day 3 One thing many trekkers want to know is what they will see along the way. The trail is not just a simple uphill walk. Here is what the route usually looks like: Leave Juda Ka Talab after breakfast. Walk through thick pine and oak forests. Reach open clearings and small shepherd meadows. Cross sections where the tree line starts thinning. Get your first big mountain views. Climb the final slope to Kedarkantha Base Camp. The exact route may change slightly depending on snow conditions and campsite location. Why Day 3 Feels Different The first two days focus on getting deeper into the mountains. Day 3 feels different because the mountains finally become the main attraction. At Juda Ka Talab, trees surround you from all sides. At base camp, the landscape feels much bigger and more open. You can see long mountain ranges stretching across the horizon. I still remember reaching the base camp on a clear winter afternoon. The first thing that caught my eye was Swargarohini Peak standing tall in the distance. Everyone in our group stopped talking for a few moments and simply enjoyed the view. Those are the moments people remember long after the trek ends. Views from Kedarkantha Base Camp The base camp offers some of the finest views on the trek. On a clear day, you may see: Swargarohini Peak Bandarpoonch Peak Black Peak Ranglana Peak Several Himalayan ridges and valleys If you want to know more about the surrounding mountain ranges, check out these peaks visible from Kedarkantha Summit. Sunset is often the highlight of the evening. As the sun goes down, the snow-covered peaks turn golden and orange. Many trekkers spend an hour simply watching the colours change. Weather at Kedarkantha Base Camp Weather becomes colder as you climb higher. During the winter season, daytime temperatures at base camp often stay between 2°C and 8°C. At night, temperatures can drop below -5°C. During December and January, temperatures sometimes fall below -10°C. Clouds can build up quickly in the afternoon. Light snowfall is also common during the winter months. This is why most trekking groups try to reach base camp before noon or early afternoon. Read here about: best time to visit Kedarkantha Trek. Day 3 in December vs March The experience can feel very different depending on when you visit. In December and January, the trail is usually covered with fresh snow. Trees, meadows, and campsites all look like a winter postcard. Snow can sometimes reach ankle or knee height. Many trekkers choose the Kedarkantha in December specifically for these snowy landscapes. By March, the weather becomes milder. Snow starts melting on lower sections of the trail. The days feel warmer, and walking becomes easier for beginners. If you want deep snow, choose December or January. If you prefer slightly easier trekking conditions, March can be a better option. Altitude and Safety Tips The climb from Juda Ka Talab to base camp takes you above 11,000 feet. Most trekkers do not face serious problems, but it is still important to watch for altitude-related symptoms. Common signs include: Headache Nausea Dizziness Loss of appetite Unusual tiredness If any symptoms become worse, tell your trek leader immediately. Before your trek, it is worth reading

Day 3 Kedarkantha Trek: Juda Ka Talab to Base Camp Read More »